|
以下在CentOS系统安装GitLab,首先声明的是在本次操作中有些错误的出现,但是不一定会在你的操作过程中出现,即使有错误也是可以解决的。以下是主要步骤如下:
1.系统准备 装好系统第一件事应该是更新软件包: yum -y update 安装Gitlab依赖的软件: yum install curl policycoreutils openssh-server openssh-clients systemctl enable sshd && systemctl start sshd yum install postfix systemctl enable postfix systemctl start postfix 最后这一步出现错误,提示: Job for postfix.service failed. See 'systemctl status postfix.service' and 'journalctl -xn' for details. 依照指示执行命令: systemctl status postfix.service 错误的原因是: [时间][主机名] postfix/sendmail[进程ID]: fatal: parameter inet_interfaces: no local interface found for ::1 知道了原因,所以打开/etc/postfix/main.cf,在第119行附近找到: inet_protocols = all 把all改成ipv4,保存。 再执行以下命令: systemctl start postfix 成功。 然后设置防火墙。 firewall-cmd --permanent --add-service=http 报错:FirewallD is not running 打开/etc/sysctl.conf,在文件最后添加新的一行: net.ipv4.ip_forward=1 保存就行。 重载配置,启动firewalld并检查firewalld状态: sysctl -p systemctl start firewalld && systemctl status firewalld -l 第一行执行完之后,刚刚添加的一行会显示出来。检查结果会返回绿色的active。 重新执行上面“设置防火墙” firewall-cmd --permanent --add-service=http 命令,成功。 重载防火墙。 systemctl reload firewalld
2.安装Gitlab 由于网络环境的原因,将repo源修改为清华大学: 1].针对RHEL/CentOS用户: 新建 /etc/yum.repos.d/gitlab-ce.repo,内容为 [gitlab-ce] name=Gitlab CE Repository baseurl=https://mirrors.tuna.tsinghua.edu.cn/gitlab-ce/yum/el$releasever/ gpgcheck=0 enabled=1 再执行命令: sudo yum makecache sudo yum install gitlab-ce 执行以上命令后大功告成。 2].针对Debian 9用户: 首先信任 GitLab 的 GPG 公钥: curl https://packages.gitlab.com/gpg.key 2> /dev/null | sudo apt-key add - &>/dev/null 再选择你的 Debian/Ubuntu 版本,文本框中内容写进 /etc/apt/sources.list.d/gitlab-ce.list deb http://mirrors.tuna.tsinghua.edu.cn/gitlab-ce/debian stretch main 安装 gitlab-ce命令: sudo apt-get update sudo apt-get install gitlab-ce 3].针对Ubuntu 16.04用户: 和针对Debian 9用户一样,所不同的是把源改成: deb https://mirrors.tuna.tsinghua.edu.cn/gitlab-ce/ubuntu xenial main 如果是Ubuntu 14.04用户则改成: deb https://mirrors.tuna.tsinghua.edu.cn/gitlab-ce/ubuntu trusty main 同样道理,如果是Debian 8用户就改成: deb http://mirrors.tuna.tsinghua.edu.cn/gitlab-ce/debian jessie main
3.配置并启动gitlab sudo gitlab-ctl reconfigure 配置文件在/etc/gitlab/gitlab.rb可根据需要更改,每次更改gitlab.rb都需要重新运行: sudo gitlab-ctl reconfigure
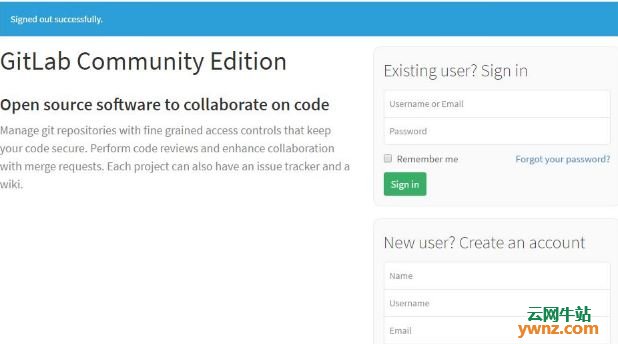
4.首次访问 安装完成后可以通过http://ip访问了gitlab,默认账户是root,首次登录会设置更改密码。
5.升级Gitlab 如果在后台components旁边看到橙色的update available,则说明有新版本。执行以下命令升级: yum update -y
相关主题 |