|
本文通过AMD开发ROCm平台,Ubuntu 18.04系统中,TensorFlow也能使用AMD GPU实现GPU加速。现在把具体搭建流程呈上。
电脑硬件信息 CPU:AMD Ryzen 1700x GPU:AMD Radeon RX580 内存:32G 硬盘:SSD 256GB + HDD 2TB
系统安装的是Ubuntu 18.04 本文针对的是Ubuntu 18.04,我选的是最小安装方式,当然也可以安装优麒麟Ubuntu Kylin 18.04,可以参考教程:https://ywnz.com/linuxaz/1443.html
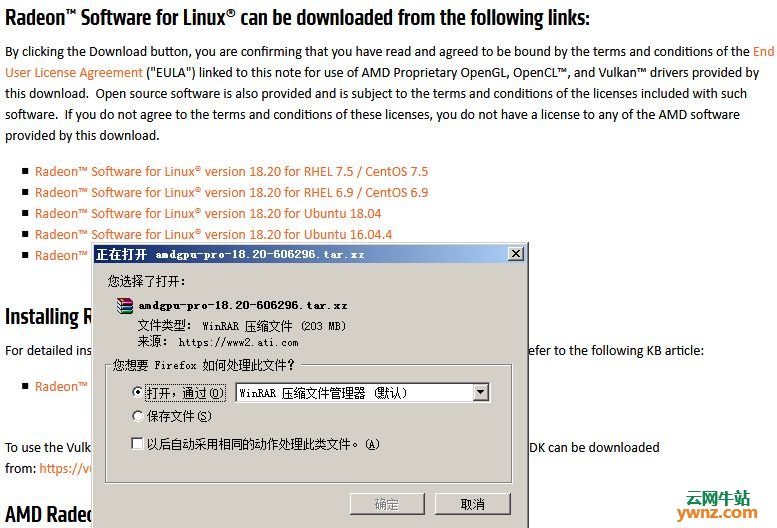
安装AMD GPU驱动程序 1.下载最新的驱动程序,我使用的是18.20版本。 里面包含for RHEL 7.5/CentOS 7.5、RHEL 6.9/CentOS 6.9、Ubuntu 18.04、Ubuntu 16.04.4、SLED/SLES 12 SP3版本,选择Radeon Software for Linux version 18.20 for Ubuntu 18.04版本下载。
2.以下载到Downloads目录为例: cd ~/Downloads tar -Jxvf amdgpu-pro-18.20-606296.tar.xz cd ~/Downloads/amdgpu-pro-18.20-606296 ./amdgpu-pro-install --opencl=legacy
安装ROCm 1.增加ROCm的仓库 wget -qO - http://repo.radeon.com/rocm/apt/debian/rocm.gpg.key | sudo apt-key add - sudo sh -c 'echo deb [arch=amd64] http://repo.radeon.com/rocm/apt/debian/ xenial main > /etc/apt/sources.list.d/rocm.list' 2.然后运行 sudo apt update sudo apt install rocm-dkms 3.安装会报错,因为amdgpu这个AMD GPU的驱动程序在使用同一DKMS,我们强制安装这个包: sudo dpkg -i --force-overwrite /var/cache/apt/archives/rock-dkms_1.8-192_all.deb sudo apt install -f 4.重新启动 sudo reboot 至此安装完毕。 5.可以使用rocminfo测试一下是否安装成功。 /opt/rocm/bin/rocminfo
安装TensorFlow(ROCm port) 1.下载TensorFlow的ROCm专用轮子 2.运行以下命令安装相关软件包 sudo apt-get update && \ sudo apt-get install -y --allow-unauthenticated \ rocm-dkms rocm-dev rocm-libs \ rocm-device-libs \ hsa-ext-rocr-dev hsakmt-roct-dev hsa-rocr-dev \ rocm-opencl rocm-opencl-dev \ rocm-utils \ rocm-profiler cxlactivitylogger \ miopen-hip miopengemm 3.然后安装python相关软件包 sudo apt-get update && sudo apt-get install -y \ python3-numpy \ python3-dev \ python3-wheel \ python3-mock \ python3-future \ python3-pip \ python3-yaml \ python3-setuptools 4.安装之后安装我们的轮子(以Downloads目录为例) sudo pip3 install ~/Downloads/tensorflow-1.8.0-cp35-cp35m-manylinux1_x86_64.whl 估计你安装不上。因为会报错,Ubuntu 18.04系统已经自动升级python为3.6了。没关系,把文件名里的35改成36,可以正常安装。不过在每次运行TensorFlow时会报错,但不影响使用。 5.测试一下吧 Python 3.6.5 (default, Apr 1 2018, 05:46:30) [GCC 7.3.0] on linux Type "help", "copyright", "credits" or "license" for more information. >>> import tensorflow as tf /usr/lib/python3.6/importlib/_bootstrap.py:219: RuntimeWarning: compiletime version 3.5 of module 'tensorflow.python.framework.fast_tensor_util' does not match runtime version 3.6 return f(*args, **kwds) >>> hello = tf.constant('Hello, TensorFlow!') >>> sess = tf.Session() 2018-07-23 8:59:14.289004: I tensorflow/core/platform/cpu_feature_guard.cc:141] Your CPU supports instructions that this TensorFlow binary was not compiled to use: SSE4.1 SSE4.2 AVX AVX2 FMA 2018-07-23 8:59:14.296182: W tensorflow/stream_executor/rocm/rocm_driver.cc:404] creating context when one is currently active; existing: 0x7fa28910d130 2018-07-23 8:59:14.296312: I tensorflow/core/common_runtime/gpu/gpu_device.cc:1451] Found device 0 with properties: name: Ellesmere [Radeon RX 470/480] AMDGPU ISA: gfx803 memoryClockRate (GHz) 1.266 pciBusID 0000:09:00.0 Total memory: 8.00GiB Free memory: 7.75GiB 2018-07-23 8:59:14.296337: I tensorflow/core/common_runtime/gpu/gpu_device.cc:1562] Adding visible gpu devices: 0 2018-07-23 8:59:14.296360: I tensorflow/core/common_runtime/gpu/gpu_device.cc:989] Device interconnect StreamExecutor with strength 1 edge matrix: 2018-07-23 8:59:14.296372: I tensorflow/core/common_runtime/gpu/gpu_device.cc:995] 0 2018-07-23 8:59:14.296384: I tensorflow/core/common_runtime/gpu/gpu_device.cc:1008] 0: N 2018-07-23 8:59:14.296429: I tensorflow/core/common_runtime/gpu/gpu_device.cc:1124] Created TensorFlow device (/job:localhost/replica:0/task:0/device:GPU:0 with 7539 MB memory) -> physical GPU (device: 0, name: Ellesmere [Radeon RX 470/480], pci bus id: 0000:09:00.0) >>> sess.run(hello) b'Hello, TensorFlow!' >>> b = tf.constant(32) >>> sess.run(a+b) 42 >>> sess.close() >>> exit()
相关主题 |