|
本文向你展示在CentOS 7服务器/系统桌面下安装和使用LXD的简单方法。
LXD的特点 如下是LXD的最大特色: 设计安全(无特权的容器,资源限制等) 可扩展(来自数千个计算节点上的容器) 直观(简单,清晰的API和清晰的命令行体验) Image-based(每天发布各种Linux发行版) 支持跨主机容器和映像传输(包括使用CRIU进行实时迁移) 高级资源控制(CPU,内存,网络I/O,块I/O,磁盘使用和内核资源) 设备直通(USB,GPU,Unix字符和块设备,NIC,磁盘和路径) 网络管理(网桥创建和配置,跨主机隧道) 存储管理(支持多个存储后端,存储池和存储卷)
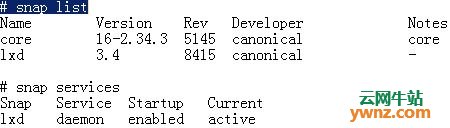
使用Snap在CentOS 7下安装LXD 现在让我们按照以下步骤开始在CentOS 7系统下安装LXD。 一、在CentOS 7下安装snapd 二、配置内核参数 在系统上启用LXD需要一些内核选项,通过在终端上运行以下命令来配置它们,以root用户身份运行这些命令: grubby --args="user_namespace.enable=1" --update-kernel="$(grubby --default-kernel)" grubby --args="namespace.unpriv_enable=1" --update-kernel="$(grubby --default-kernel)" echo "user.max_user_namespaces=3883" > /etc/sysctl.d/99-userns.conf 进行更改后,你需要重新启动系统: sudo reboot 三、安装ZFS(可选) 如果你想将ZFS与LXD容器一起使用,则需要安装它,如果不使用ZFS,请跳过此步骤: sudo yum install http://download.zfsonlinux.org/epel/zfs-release.el7_4.noarch.rpm sudo yum-config-manager --disable zfs sudo yum-config-manager --enable zfs-kmod sudo yum install zfs 四、在CentOS 7下安装lxd snap 最后,从snap store安装LXD snap: $ sudo snap install lxd lxd 3.4 from 'canonical' installed 如果你有好的互联网连接,安装应该很快的,可以使用以下方法确认包安装: # snap list # snap services
五、启动测试LXD容器 让我们将我们的用户帐户添加到grouplxd,以便在没有权限错误的情况下管理LXD容器: sudo usermod -aG lxd jmutai sudo newgrp lxd 使用配置LXD环境: $ sudo lxd init Would you like to use LXD clustering? (yes/no) [default=no]: Do you want to configure a new storage pool? (yes/no) [default=yes]: Name of the new storage pool [default=default]: Name of the storage backend to use (btrfs, ceph, dir, lvm) [default=btrfs]: Create a new BTRFS pool? (yes/no) [default=yes]: Would you like to use an existing block device? (yes/no) [default=no]: Size in GB of the new loop device (1GB minimum) [default=15GB]: Would you like to connect to a MAAS server? (yes/no) [default=no]: Would you like to create a new local network bridge? (yes/no) [default=yes]: What should the new bridge be called? [default=lxdbr0]: What IPv4 address should be used? (CIDR subnet notation, “auto” or “none”) [default=auto]: What IPv6 address should be used? (CIDR subnet notation, “auto” or “none”) [default=auto]: Would you like LXD to be available over the network? (yes/no) [default=no]: Would you like stale cached images to be updated automatically? (yes/no) [default=yes] Would you like a YAML "lxd init" preseed to be printed? (yes/no) [default=no]: 容器列表应返回一个空列表: # lxc list
通过运行以下命令创建测试CentOS 7容器: # lxc launch images:centos/7/amd64 cent7 Creating cent7 Starting cent7 通过运行启动Ubuntu容器: # lxc launch ubuntu:18.04 ubuntu18 Creating ubuntu18 Starting ubuntu18 列出你的容器: # lxc list
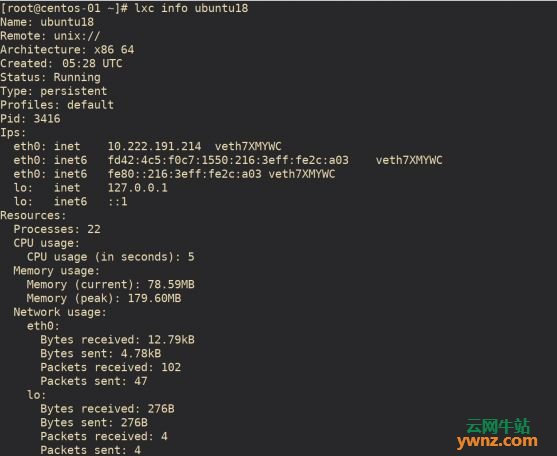
停止,启动,重启,删除,检查信息容器: lxc start container lxc stop container lxc restart container 使用info命令选项获取有关容器的信息 lxc info container 输出如下内容:
有关更多命令行选项,请运行: lxc --help lxc command --help e.g lxc start --help 至此,你已经从snap成功在CentOS 7系统下安装了LXD并创建了一个lxc容器。
相关主题 |