|
本文将介绍使用 Nginx 的 image_filter 模块来实现动态生成缩略图。从 Nginx 0.7.54 以后的版本,提供了一个 http_image_filter_module 的集成图片处理模块。该模块可以实现实时缩放图片、旋转图片、验证图片有效性以及获取图片宽高以及图片类型信息等功能。 在以前我们实现缩略图机制通常是在当用户上传一张图片后,后端程序会固定将图片生成前端页面需要的不同大小缩略图。不管前端页面是否有使用,后端都会先产生好,这样做明显有以下缺陷: 1.占用过多的磁盘空间大小。 2.前端页面需要更多样格式的缩略图时,需要单独处理。 当出现第二个问题时会比较麻烦,后端程序就需要将系统的全部图片重新产生一次所需的缩略图。这个过程非常耗时,也比较耗费系统性能。 现在比较流行的做法是改成透过 URL 定义长宽来即时生成所需的缩略图,实现的方式也有多种多样,比如本文介绍的方法。
安装 image_filter 模块 http_image_filter_module 模块在默认情况下是没有包含在官方预编译包中的,如果需要使用 http_image_filter_module 模块需要重新编译 Nginx。 1.查看是否已安装 image_filter 模块 $ nginx -V 如果返回的结果中含有 --with-http_image_filter_module 字样就表明已经安装了 image_filter 模块。 2.编译 Nginx 并加入 image_filter 模块 启用 http_image_filter_module 模块的方法是比较简单的,由于http_image_filter_module 扩展需要 GD 库支持,首先需要安装相关依赖环境: # CentOS/RHEL系统: $ sudo yum -y install gd-devel # Ubuntu/Debian系统: $ sudo apt-get install libgd2-xpm-dev 其次在原来的 Nginx 编译参数上加上 --with-http_image_filter_module 参数后重新编译 Nginx 就行了。 $ sudo wget http://nginx.org/download/nginx-1.15.0.tar.gz $ sudo tar xzvf nginx-1.15.0.tar.gz $ cd nginx-1.15.0/ $ sudo ./configure --prefix=/etc/nginx --sbin-path=/usr/sbin/nginx --modules-path=/usr/lib/nginx/modules --conf-path=/etc/nginx/nginx.conf --error-log-path=/var/log/nginx/error.log --http-log-path=/var/log/nginx/access.log --pid-path=/var/run/nginx.pid --lock-path=/var/run/nginx.lock --http-client-body-temp-path=/var/cache/nginx/client_temp --http-proxy-temp-path=/var/cache/nginx/proxy_temp --http-fastcgi-temp-path=/var/cache/nginx/fastcgi_temp --http-uwsgi-temp-path=/var/cache/nginx/uwsgi_temp --http-scgi-temp-path=/var/cache/nginx/scgi_temp --user=nginx --group=nginx --with-compat --with-file-aio --with-threads --with-http_addition_module --with-http_auth_request_module --with-http_dav_module --with-http_flv_module --with-http_gunzip_module --with-http_gzip_static_module --with-http_mp4_module --with-http_random_index_module --with-http_realip_module --with-http_secure_link_module --with-http_slice_module --with-http_ssl_module --with-http_stub_status_module --with-http_sub_module --with-http_v2_module --with-mail --with-mail_ssl_module --with-stream --with-stream_realip_module --with-stream_ssl_module --with-stream_ssl_preread_module --with-cc-opt='-g -O2 -fstack-protector-strong -Wformat -Werror=format-security -Wp,-D_FORTIFY_SOURCE=2 -fPIC' --with-ld-opt='-Wl,-Bsymbolic-functions -Wl,-z,relro -Wl,-z,now -Wl,--as-needed -pie' --with-http_image_filter_module $ make && make install 3.验证是否安装成功 $ nginx -V nginx version: nginx/1.15.0 built by gcc 5.4.0 20160609 (Ubuntu 5.4.0-6ubuntu1~16.04.4) built with OpenSSL 1.0.2g TLS SNI support enabled configure arguments: --prefix=/etc/nginx --sbin-path=/usr/sbin/nginx --modules-path=/usr/lib/nginx/modules --conf-path=/etc/nginx/nginx.conf --error-log-path=/var/log/nginx/error.log --http-log-path=/var/log/nginx/access.log --pid-path=/var/run/nginx.pid --lock-path=/var/run/nginx.lock --http-client-body-temp-path=/var/cache/nginx/client_temp --http-proxy-temp-path=/var/cache/nginx/proxy_temp --http-fastcgi-temp-path=/var/cache/nginx/fastcgi_temp --http-uwsgi-temp-path=/var/cache/nginx/uwsgi_temp --http-scgi-temp-path=/var/cache/nginx/scgi_temp --user=nginx --group=nginx --with-compat --with-file-aio --with-threads --with-http_addition_module --with-http_auth_request_module --with-http_dav_module --with-http_flv_module --with-http_gunzip_module --with-http_gzip_static_module --with-http_mp4_module --with-http_random_index_module --with-http_realip_module --with-http_secure_link_module --with-http_slice_module --with-http_ssl_module --with-http_stub_status_module --with-http_sub_module --with-http_v2_module --with-mail --with-mail_ssl_module --with-stream --with-stream_realip_module --with-stream_ssl_module --with-stream_ssl_preread_module --with-cc-opt='-g -O2 -fstack-protector-strong -Wformat -Werror=format-security -Wp,-D_FORTIFY_SOURCE=2 -fPIC' --with-ld-opt='-Wl,-Bsymbolic-functions -Wl,-z,relro -Wl,-z,now -Wl,--as-needed -pie' --with-http_image_filter_module 如果返回的结果中含有 --with-http_image_filter_module 字样就表明安装成功了。
image_filter 模块常用参数说明 # 关闭模块 image_filter off; # 确保图片是 JPEG、GIF、PNG、或者 WebP,否则返回 415 错误 image_filter test; # 输出有关图像的 json 格式,例如 { "img" : { "width": 100, "height": 100, "type": "gif" } } ,如果出错显示:{} image_filter size; # 将图像旋转指定度数,参数可以包括变量。单独或一起与 resize crop 一起使用。 image_filter rotate 90|180|270; # 按比例减少图像到指定大小,要减少一个维度,可以将另一个维度指定为 "-" 来表示, 出错返回 415 错误。参数值可包含变量,可以与 rotate 一起使用。 image_filter resize width height; # 按比例将图像缩小到较大的一侧,并在另一侧产生无关边缘。其它和 rotate 一样。 image_filter crop width height; # 设置读取图像缓冲的最大大小,超过则报 415 错误。 image_filter_buffer 10M; # 如果启用,最终图像将交错。对于JPEG,最终图像将采用 "逐行JPEG" 格式。 image_filter_interlace on; # 设置转换的 JPEG 图像的质量。可接受的值是从 1 到 100 的范围内。较小的值通常意味着图像质量越低,以达到减少数据传输。推荐的最大值为 95,参数值可以包含变量。 image_filter_jpeg_quality 95; # 增加最终图像的清晰度,锐度百分比可以超过 100。零值将禁用锐化。参数值可以包含变量。 image_filter_sharpen 100; # 定义在使用调色板指定的颜色转换 GIF 图像或 PNG 图像时是否应保留透明度。透明度的降低会导致质量更好的图像,PNG 中 的 alpha 通道透明度始终保留。 image_filter_transparency on;
使用 image_filter 模块动态生成缩略图 1.配置 image_filter 模块 这里给出一个简单的例子,在你的 Nginx 配置文件中 Server 配置段增加如下内容: 运行:$ sudo vim nginx.conf ... server { listen 80 default_server; listen [::]:80 default_server; server_name ywnz.com; location ~ ^/([0-9]+)/(.*)$ { set $width $1; set $path $2; set $EXPIRE_TIME 1d; set $JPG_QUALITY 95; rewrite ^ /$path break; image_filter resize $width -; image_filter_buffer 100M; image_filter_jpeg_quality ${JPG_QUALITY}; expires ${EXPIRE_TIME}; } } ... 2.重载 Nginx 配置 $ sudo nginx -s reload 3.生成缩略图 通过在图片请求地址的文件名前加上 /缩放大小/,就可以访问到你想要的任意尺寸的缩略图。例如:要生成缩略图的图片地址为:http://192.168.100.210/01.jpg,现在只需要将请求修改为:http://192.168.100.210/200/01.jpg 将会自动返回对应的缩略图。
给 image_filter 模块加入缓存机制 默认情况下,image_filter 模块都是实时生成缩略图的。每一次请求 Nginx 都会需要处理,如果有 10000 次请求,就会处理 10000 次。这样就会在高并发请求时给 Nginx 服务器造成压力。 要解决这个问题,我们可以通过 Nginx 的 Proxy Cache 机制让 Nginx 在相同请求的情况下只产生一次缩略图,并且将缩略图放到缓存目录中以减少短时间内的不同请求所产生的运算次数。 由于 image_filter 模块无法跟 Proxy Cache 同时处理,要实现这个功能必须要将请求拆成两个 Host 来达成。具体配置如下: 运行:$ sudo vim nginx.conf ... proxy_cache_path /data keys_zone=cache_zone:10m; server { # Internal image resizing server. server_name localhost; listen 8888; location ~ ^/([0-9]+)/(.*)$ { set $width $1; set $path $2; set $JPG_QUALITY 95; rewrite ^ /$path break; #proxy_pass ${IMAGE_HOST}; image_filter resize $width -; image_filter_buffer 100M; image_filter_jpeg_quality ${JPG_QUALITY}; } } server { listen 80 default_server; listen [::]:80 default_server; server_name ywnz.com; location ~ ^/([0-9]+)/(.*)$ { set $width $1; set $path $2; set $EXPIRE_TIME 1d; rewrite ^ /$path break; proxy_pass http://127.0.0.1:8888/$width/$path; proxy_cache cache_zone; proxy_cache_key $uri; proxy_cache_valid 200 302 24h; proxy_cache_valid 404 1m; # expire time for browser expires ${EXPIRE_TIME}; } }
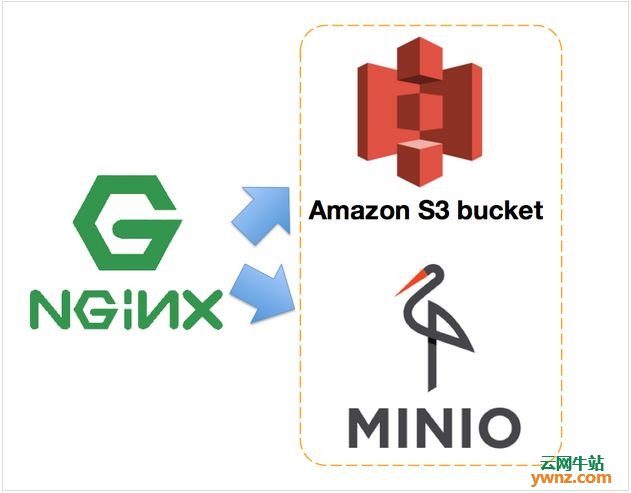
使用 Docker 容器快速构建 如果你和我一样比较偏爱使用 Docker,可以直接使用 nginx-image-resizer 项目。nginx-image-resizer 项目是一个用 Docker 实现的实时图像调整大小和缓存的容器项目,nginx-image-resizer 支持 Amazon S3 和 Minio 作为存储。
下面给一个使用 Minio 作为存储的 docker-compose 示例: 1.编写 docker-compose 配置文件 运行:$ vim docker-compose.yml version: '2' services: minio: image: minio/minio container_name: minio ports: - "9000:9000" volumes: - minio-data:/data environment: MINIO_ACCESS_KEY: YOUR_MINIO_ACCESS_KEY MINIO_SECRET_KEY: YOUR_MINIO_SECRET_KEY command: server /data image-resizer: image: appleboy/nginx-image-resizer container_name: image-resizer ports: - "80:80" environment: IMAGE_HOST: http://minio:9000 NGINX_HOST: localhost volumes: minio-data: 注:MINIO_ACCESS_KEY 和 MINIO_SECRET_KEY 分别为 Minio 的登陆帐号和密码,请根据实际情况修改。 2.启动相关容器 $ docker-compose up -d 3.生成缩略图 生成缩略图的方法和前面方法类似,但由于这里使用了 Minio 做为文件存储服务,所以需要先在 Minio 中上传图片文件。在 Minio 中上传文件的方法大致分为以下几步: 1].登陆 Minio Web 管理界面, Web 管理界面访问地址默认为:http://HostIP:9000。 2].创建 bucket,这里我们创建一个名为 test 的 bucket。 3].设置名为 test 的 bucket 的访问权限。 4].在名为 test 的 bucket 中上传图片文件。 完成以上几步后,和前面类似直接在访问的 URL 中加入需缩放图片比例即可生成对应缩略图。例如:访问:http://192.168.100.210/600/test/test1.jpg 将会自动返回对应的缩略图。
其它相关说明 利用 Nginx 的 image_filter 模块不仅仅能生成缩略图,你还可以通过修改配置来实现其它的功能,比如图片旋转、图片裁剪、图片透明化等等。关于 image_filter 模块的更多使用方法可参考官方文档。
相关主题 |