|
本文介绍在Ubuntu 18.04操作系统上安装Taiga.io项目管理工具的详细步骤。
简介 Taiga.io是一个带有scrum的项目管理Web应用程序,它建立在Django和AngularJS之上。它为你提供简单高效的项目协作、时间跟踪、错误跟踪、看板、维基、报告等功能。
步骤一、设置所有的依赖项 设置主机系统主机名并更新系统 sudo hostnamectl set-hostname taiga.example.com sudo apt update echo "192.168.18.10 taiga.example.com" | sudo tee -a /etc/hosts 然后通过运行命令安装Taiga.io依赖包: sudo apt -y install git pwgen automake wget curl gettext circus \ build-essential libgdbm-dev binutils-doc autoconf flex gunicorn \ bison libjpeg-dev libzmq3-dev libfreetype6-dev zlib1g-dev \ libncurses5-dev libtool libxslt-dev libxml2-dev libffi-dev python3 \ virtualenvwrapper python3-dev python3-pip python3-dev libssl-dev circus nginx 确认安装的Python版本: $ python3 -V 建议将pip升级到最新版本 sudo pip3 install --upgrade setuptools pip 另一个依赖包是Node.js,使用coffee-script Node包安装它: curl -sL https://deb.nodesource.com/setup_8.x | sudo -E bash - sudo apt-get install -y gcc g++ make nodejs sudo npm install -g gulp coffee-script 我们还需要创建一个用于运行和管理Taiga.io服务的用户帐户: sudo adduser taiga sudo adduser taiga sudo
步骤二、安装和配置PostgreSQL Taiga.io需要PostgreSQL数据库,安装和配置如下: 导入存储库签名密钥: wget --quiet -O - https://www.postgresql.org/media/keys/ACCC4CF8.asc | sudo apt-key add - 添加PostgreSQL apt存储库: echo "deb http://apt.postgresql.org/pub/repos/apt/ bionic-pgdg main" | sudo tee /etc/apt/sources.list.d/pgdg.list 更新包列表并安装postgresql包: sudo apt update sudo apt -y install postgresql-10 PostgreSQL 10的配置文件是: /etc/postgresql/10/main/postgresql.conf 使用以下命令设置PostgreSQL管理员用户密码: $ sudo passwd postgres Enter new UNIX password: Retype new UNIX password: passwd: password updated successfully 为Taiga.io创建数据库和用户: $ sudo su - postgres postgres@taiga:~$ createuser taiga postgres@taiga:~$ psql psql (10.5 (Ubuntu 10.5-2.pgdg18.04+1)) Type "help" for help. postgres=# ALTER USER taiga WITH ENCRYPTED password 'StrongPassword'; postgres=# CREATE DATABASE taiga OWNER taiga; postgres=# \q postgres@taiga:~$ exit 更换: 使用Taiga.io的数据库用户名taiga。 具有强大的taiga用户数据库密码的StrongPassword。 可以参考在Ubuntu 18.04/Ubuntu 16.04上安装PostgreSQL 11的说明。
步骤三、安装Erlang并配置RabbitMQ Taiga消息队列由RabbitMQ处理,但默认情况下不会安装在Ubuntu上。 参考: 在Ubuntu 18.04系统中安装Erlang并测试的方法 在Ubuntu 18.04 LTS系统上安装RabbitMQ服务器的步骤 安装RabbitMQ服务器后,为Taiga创建用户和vhost: sudo rabbitmqctl add_user taiga StrongPassword sudo rabbitmqctl add_vhost taiga sudo rabbitmqctl set_permissions -p taiga taiga ".*" ".*" ".*"
步骤四、安装和配置Taiga Backend 切换到步骤一中创建的Taiga用户帐户并创建日志文件夹: su - taiga mkdir -p ~/logs 1、来自Github的Clone Taiga Backend项目 git clone https://github.com/taigaio/taiga-back.git cd taiga-back git checkout stable 2、创建Virtualenv 然后为Taiga.io后端创建一个Virtualenv并安装所需的依赖项: mkvirtualenv -p /usr/bin/python3 taiga_venv pip3 install -r requirements.txt 3、使用初始基本数据填充数据库 python3 manage.py migrate --noinput python3 manage.py loaddata initial_user python3 manage.py loaddata initial_project_templates python3 manage.py compilemessages python3 manage.py collectstatic --noinput 在运行上述命令时,数据将导入PostgreSQL数据库,这还会创建管理员帐户,其登录为admin,密码为123123。 如果需要样本数据,可以使用python3 manage.py sample_data加载它,这仅适用于DEMO PURPOSES,以后可能很难清理数据。 4、Crete配置 将以下配置复制到~/taiga-back/settings/local.py并使用你自己的详细信息进行更新: from .common import * MEDIA_URL = "http://taiga.example.com/media/" STATIC_URL = "http://taga.example.com/static/" SITES["front"]["scheme"] = "http" SITES["front"]["domain"] = "taiga.example.com" SECRET_KEY = "OQOEJNSJIQHDBQNSUQEJSNNANsqQPAASQLSMSOQND" DEBUG = False PUBLIC_REGISTER_ENABLED = True DEFAULT_FROM_EMAIL = "no-reply@example.com" SERVER_EMAIL = DEFAULT_FROM_EMAIL #CELERY_ENABLED = True EVENTS_PUSH_BACKEND = "taiga.events.backends.rabbitmq.EventsPushBackend" EVENTS_PUSH_BACKEND_OPTIONS = {"url": "amqp://taiga:StrongPassword@localhost:5672/taiga"} # Uncomment and populate with proper connection parameters # for enable email sending. EMAIL_HOST_USER should end by @domain.tld #EMAIL_BACKEND = "django.core.mail.backends.smtp.EmailBackend" #EMAIL_USE_TLS = False #EMAIL_HOST = "localhost" #EMAIL_HOST_USER = "" #EMAIL_HOST_PASSWORD = "" #EMAIL_PORT = 25 # Uncomment and populate with proper connection parameters # for enable github login/singin. #GITHUB_API_CLIENT_ID = "yourgithubclientid" #GITHUB_API_CLIENT_SECRET = "yourgithubclientsecret" 更改设置以适合你的环境,设置RabbitMQ连接用户名和密码,Taiga.io域,密钥和可选的电子邮件设置。 5、验证 要确保一切正常,请输出以下命令以在开发模式下运行后端以进行测试: workon taiga_venv python manage.py runserver curl http://127.0.0.1:8000/api/v1/ 成功输出示例: Performing system checks... System check identified no issues (0 silenced). October 24, 2018 - 22:21:54 Django version 1.11.2, using settings 'settings' Starting development server at http://127.0.0.1:8000/ Quit the server with CONTROL-C. 禁用你的Virtualenv以开始前端安装: $ deactivate
步骤五、安装和配置Taiga Frontend taiga-front主要用angularjs和CoffeeScript编写,取决于后端,在执行这些部分配置之前,你需要配置Taiga backend。 切换到taigauser帐户: su - taiga Clone Github项目源代码: git clone https://github.com/taigaio/taiga-front-dist.git cd taiga-front-dist git checkout stable 复制示例配置文件: cp ~/taiga-front-dist/dist/conf.example.json ~/taiga-front-dist/dist/conf.json 按照以下模式编辑示例配置(替换为自己的详细信息): $ cat ~/taiga-front-dist/dist/conf.json { "api": "http://taiga.example.com/api/v1/", "eventsUrl": "ws://taiga.example.com/events", "eventsMaxMissedHeartbeats": 5, "eventsHeartbeatIntervalTime": 60000, "eventsReconnectTryInterval": 10000, "debug": true, "debugInfo": false, "defaultLanguage": "en", "themes": ["taiga"], "defaultTheme": "taiga", "publicRegisterEnabled": true, "feedbackEnabled": true, "supportUrl": "https://tree.taiga.io/support", "privacyPolicyUrl": null, "termsOfServiceUrl": null, "GDPRUrl": null, "maxUploadFileSize": null, "contribPlugins": [], "tribeHost": null, "importers": [], "gravatar": true, "rtlLanguages": ["fa"] } 将taiga.example.com替换为你的Taiga实际域名,还可以更改其他参数以适合你的使用。
步骤六、安装Taiga Events Taiga-events是Taiga websocket服务器,它允许taiga-front显示积压、任务板、看板和问题列表中的实时更改,Taiga-events使用rabbitmq作为消息代理: cd ~ git clone https://github.com/taigaio/taiga-events.git taiga-events cd taiga-events 安装所需的javascript依赖项: npm install sudo npm install -g coffee-script 为Taiga Events创建配置文件: cp config.example.json config.json 编辑fileconfig.json并更新rabbitmq uri和密钥(请用自己的信息替代): $ cat ~/taiga-events/config.json { "url": "amqp://taiga:StrongPassword@localhost:5672/taiga", "secret": "请填写自己的secret", "webSocketServer": { "port": 8888 } } 用RabbitMQ taiga用户密码替换StrongPassword,并使用之前生成和配置的密钥替换上面的secret。
步骤七、配置Circus Circus是一个Python应用程序流程管理器,用于运行Taiga后端和事件: sudo vim /etc/circus/conf.d/taiga-events.ini 增加以下代码: [watcher:taiga-events] working_dir = /home/taiga/taiga-events cmd = /usr/bin/coffee args = index.coffee uid = taiga numprocesses = 1 autostart = true send_hup = true stdout_stream.class = FileStream stdout_stream.filename = /home/taiga/logs/taigaevents.stdout.log stdout_stream.max_bytes = 10485760 stdout_stream.backup_count = 12 stderr_stream.class = FileStream stderr_stream.filename = /home/taiga/logs/taigaevents.stderr.log stderr_stream.max_bytes = 10485760 stderr_stream.backup_count = 12 还可以在/etc/circus/conf.d/taiga.ini下为Taiga创建一个: [watcher:taiga] working_dir = /home/taiga/taiga-back cmd = gunicorn args = -w 3 -t 60 --pythonpath=. -b 127.0.0.1:8001 taiga.wsgi uid = taiga numprocesses = 1 autostart = true send_hup = true stdout_stream.class = FileStream stdout_stream.filename = /home/taiga/logs/gunicorn.stdout.log stdout_stream.max_bytes = 10485760 stdout_stream.backup_count = 4 stderr_stream.class = FileStream stderr_stream.filename = /home/taiga/logs/gunicorn.stderr.log stderr_stream.max_bytes = 10485760 stderr_stream.backup_count = 4 [env:taiga] PATH = /home/taiga/.virtualenvs/taiga_venv/bin:$PATH TERM=rxvt-256color SHELL=/bin/bash USER=taiga LANG=en_US.UTF-8 HOME=/home/taiga PYTHONPATH=/home/taiga/.virtualenvs/taiga_venv/lib/python3.6/site-packages 重新加载circusd配置: sudo systemctl restart circusd sudo systemctl status circusd 要验证服务是否正在运行,请输入以下命令: $ circusctl status circusd-stats: active plugin:flapping: active taiga: active taiga-events: active
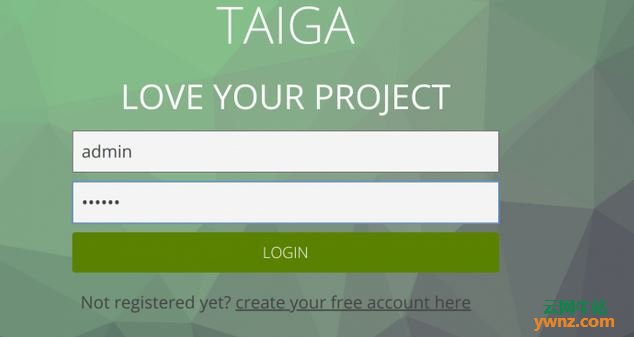
步骤八、配置Nginx 最后一步是为Taiga创建一个新的nginx虚拟主机: sudo vim /etc/nginx/conf.d/taiga.conf 增加以下代码: server { listen 80; server_name taiga.example.com; large_client_header_buffers 4 32k; client_max_body_size 50M; charset utf-8; access_log /var/log/nginx/taiga.access.log; error_log /home/taiga/logs/taiga.error.log; # Frontend location / { root /home/taiga/taiga-front-dist/dist/; try_files $uri $uri/ /index.html; } # Backend location /api { proxy_set_header Host $http_host; proxy_set_header X-Real-IP $remote_addr; proxy_set_header X-Scheme $scheme; proxy_set_header X-Forwarded-Proto $scheme; proxy_set_header X-Forwarded-For $proxy_add_x_forwarded_for; proxy_pass http://127.0.0.1:8001/api; proxy_redirect off; } # Django admin access (/admin/) location /admin { proxy_set_header Host $http_host; proxy_set_header X-Real-IP $remote_addr; proxy_set_header X-Scheme $scheme; proxy_set_header X-Forwarded-Proto $scheme; proxy_set_header X-Forwarded-For $proxy_add_x_forwarded_for; proxy_pass http://127.0.0.1:8001$request_uri; proxy_redirect off; } # Static files location /static { alias /home/taiga/taiga-back/static; } # Media files location /media { alias /home/taiga/taiga-back/media; } # Taiga-events location /events { proxy_pass http://127.0.0.1:8888/events; proxy_http_version 1.1; proxy_set_header Upgrade $http_upgrade; proxy_set_header Connection "upgrade"; proxy_connect_timeout 7d; proxy_send_timeout 7d; proxy_read_timeout 7d; } } 确认配置syntax: $ sudo nginx -t nginx: the configuration file /etc/nginx/nginx.conf syntax is ok nginx: configuration file /etc/nginx/nginx.conf test is successful 可以重新启动nginx服务了: sudo systemctl restart nginx sudo systemctl status nginx 现在应该在自己需要配置的域名上启动并运行该服务,使用用户名admin和密码123123登录:
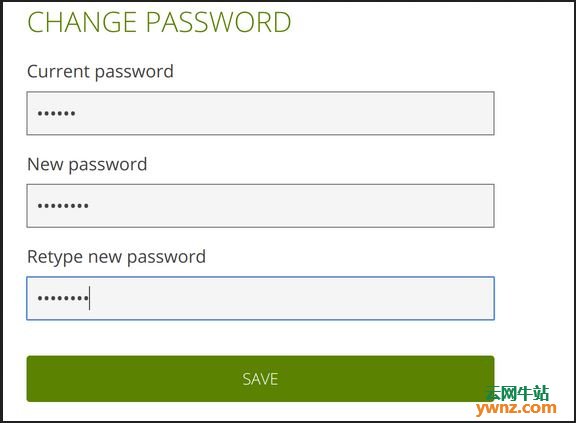
在管理员>更改密码上更改管理员密码:
提供旧密码和新密码,然后单击保存。 到了这一步,整个安装Taiga.io步骤结束了。
相关主题 |