|
在本文中我们将演示在Ubuntu 18.04 LTS服务器上安装Mailtrain的方法,Mailtrain是商业电子邮件的替代品,例如Mailchimp,安装Mailtrain最低硬件要求是:1个vCPU、1024 MB RAM。有两种在Ubuntu 18.04上运行Mailtrain的选项:可以选择在Docker容器上运行Mailtrain或在Ubuntu 18.04实例上手动安装Mailtrain。以下是在Ubuntu 18.04 LTS服务器上安装Mailtrain的具体步骤。
第1步:更新系统并安装依赖项 运行以下命令将系统软件包更新到最新版本: sudo apt update sudo apt -y install software-properties-common pwgen git dnsutils imagemagick build-essential python
第2步:在Ubuntu 18.04上安装Node.js和Redis 1、在Ubuntu 18.04上安装Node.js Node.js是安装Mailtrain的基本要求,通过以下命令安装它: curl -sL https://deb.nodesource.com/setup_8.x | sudo -E bash - sudo apt -y install nodejs sudo apt -y install gcc g++ make 2、在Ubuntu 18.04上安装Redis 使用Mailtrain可以使用Redis会话缓存,Redis用于会话存储和多个进程之间的缓存状态。如果没有在Ubuntu 18.04上安装Redis,请参考在Ubuntu 18.04/Debian 9系统上使用命令的方式安装Redis一文。
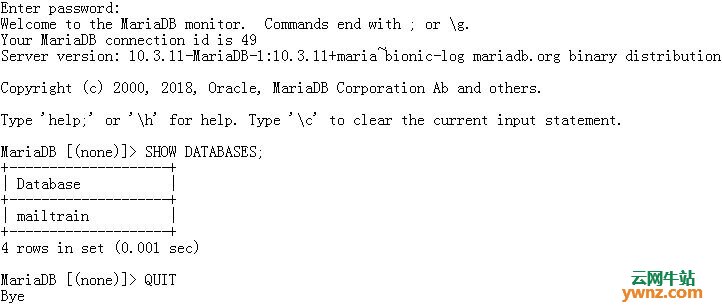
第3步:安装MariaDB/MySQL数据库服务器 MySQL/MariaDB用于存储Mailtrain数据,参考如何在Ubuntu上安装MySQL/MariaDB一文。 安装MariaDB/MySQL数据库服务器后,为Mailtrain创建用户和数据库。 1、首次以root用户身份登录MySQL shell: $ mysql -u root -p Enter password: Welcome to the MariaDB monitor. Commands end with ; or \g. Your MariaDB connection id is 48 Server version: 10.3.11-MariaDB-1:10.3.11+maria~bionic-log mariadb.org binary distribution Copyright (c) 2000, 2018, Oracle, MariaDB Corporation Ab and others. Type 'help;' or '\h' for help. Type '\c' to clear the current input statement. MariaDB [(none)]> 2、我们将为每个服务器组件创建一个数据库: CREATE DATABASE mailtrain; 3、创建数据库用户并为创建的数据库授予权限: CREATE USER 'mailtrain'@'localhost' IDENTIFIED BY 'StrongPassword'; GRANT ALL PRIVILEGES ON mailtrain.* TO 'mailtrain'@'localhost'; 4、还授予监视用户SELECT权限: CREATE USER 'mailtrain_monitoring'@'localhost' IDENTIFIED BY 'StrongPassword'; GRANT SELECT ON mailtrain.* TO 'mailtrain_monitoring'@'localhost'; FLUSH PRIVILEGES; 5、通过用户身份登录数据库来确认访问权限: $ mysql -u mailtrain -p
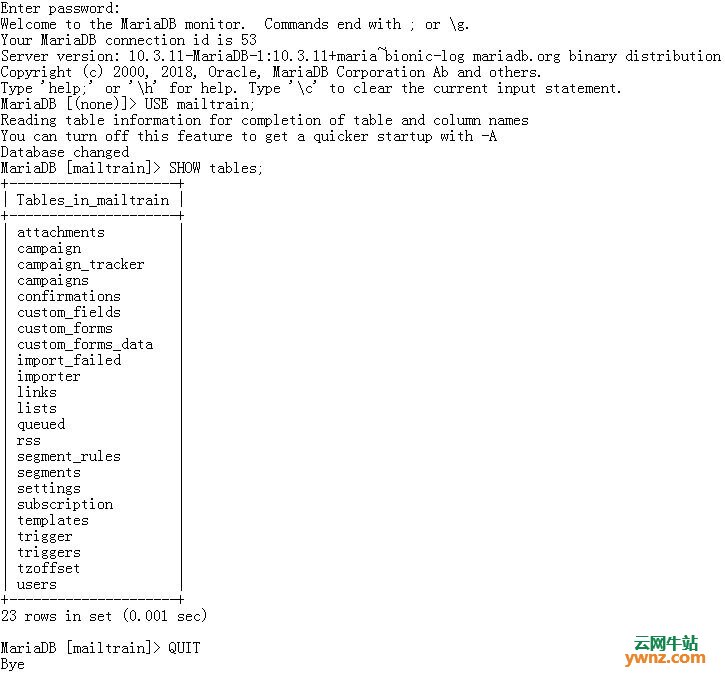
第4步:在Ubuntu 18.04上安装和配置Mailtrain 1、确保你安装了git: sudo apt -y install git 2、从github克隆邮件到/srv/mailtrain: sudo git clone https://github.com/Mailtrain-org/mailtrain.git /srv/mailtrain 3、将Mailtrain SQL导入数据库: mysql -u mailtrain -p mailtrain < /srv/mailtrain/setup/sql/mailtrain.sql 4、上面的导入将创建许多表: $ mysql -u mailtrain -p
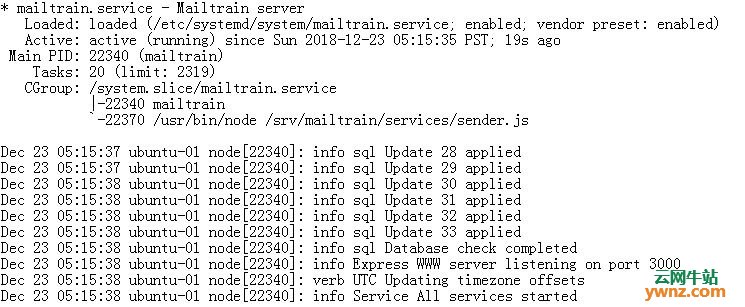
5、安装所需的节点依赖项: # cd /srv/mailtrain # npm install --production # npm audit fix 6、创建电子邮件列表配置文件: sudo cp /srv/mailtrain/config/default.toml /srv/mailtrain/config/production.toml sudo vim /srv/mailtrain/config/production.toml 7、配置要侦听的HTTP端口,协议和侦听地址: [www] # HTTP port to listen on port=3000 # HTTP interface to listen on host="0.0.0.0" # Enable HTTPS https=false 可以将端口3000更改为其他自定义端口,然后选择启用或禁用https,如果选择启用HTTPS,请确保提供证书私钥和证书文件的路径。 8、生成随机密钥以签署会话ID cookie: sudo apt -y install pwgen pwgen 32 9、在文件上设置生成的密钥: secret="du6yahghohnu2lu8nee4ahmaithooWa2" 10、请提供数据库连接详细信息: [mysql] host="localhost" user="mailtrain" password="StrongPasword" database="mailtrain" 11、如果已安装并配置了redis,请同时提供连接详细信息: [redis] # enable to use Redis session cache or disable if Redis is not installed enabled=true host="localhost" port=6379 db=5 # Uncomment if your Redis installation requires a password #password="" 12、根据需要更改其他设置并保存文件,完成后,为用户创建配置文件: sudo cp /srv/mailtrain/workers/reports/config/default.toml /srv/mailtrain/workers/reports/config/production.toml sudo vim /srv/mailtrain/workers/reports/config/production.toml 13、提供之前创建的报告/监视数据库用户: [mysql] host="localhost" user="mailtrain_monitoring" password="StrongPassword" database="mailtrain" port=3306 charset="utf8mb4" timezone="local" 14、在/etc/systemd/system/目录下输入systemd服务单元文件: sudo vim /etc/systemd/system/mailtrain.service 将以下内容粘贴到文件中: [Unit] Description=Mailtrain server Requires=mysql.service After=syslog.target network.target [Service] Environment="NODE_ENV=production" WorkingDirectory=/srv/mailtrain ExecStart=/usr/bin/node index.js Type=simple Restart=always RestartSec=10 [Install] WantedBy=multi-user.target 15、重新加载systemd并启动服务: systemctl daemon-reload sudo systemctl enable --now mailtrain 16、检查服务状态,应该返回运行状态: $ systemctl status mailtrain.service
17、Mailtrain运行后,它应绑定到端口3000中,除非在配置文件中已更改了它: # ss -tunelp | grep 3000 tcp LISTEN 0 128 0.0.0.0:3000 0.0.0.0:* users:(("mailtrain",pid=22340,fd=14)) ino:77855 sk:48 <->
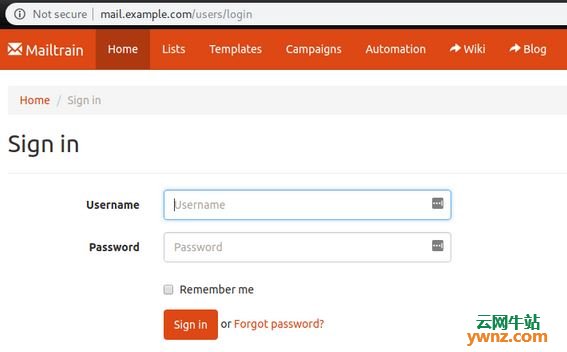
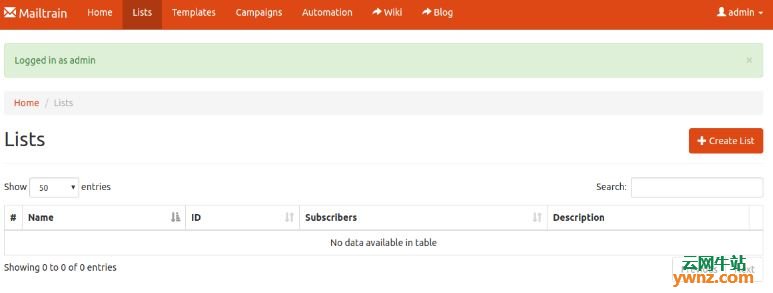
第5步:配置Nginx反向代理 1、我们可以使用Nginx代理处理对Mailtrain服务的请求: sudo apt -y install nginx sudo cp /srv/mailtrain/setup/mailtrain-nginx.conf /etc/nginx/conf.d/ 2、编辑文件以设置域名: server_name example.com www.example.com; 3、验证Nginx配置: $ sudo nginx -t nginx: the configuration file /etc/nginx/nginx.conf syntax is ok nginx: configuration file /etc/nginx/nginx.conf test is successful 4、启动并启用Nginx服务: sudo systemctl restart nginx sudo systemctl enable nginx 访问http://example.com上的Mailtrain URL:
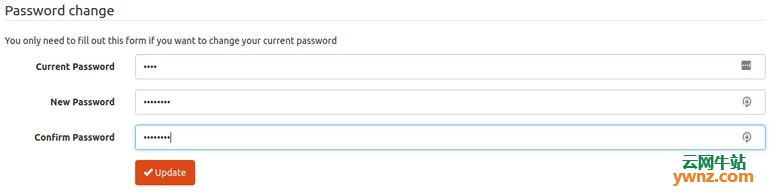
5、默认登录名是: Username: admin Password: test 6、登录管理员>帐户后更改密码:
7、提供旧密码和新密码,然后单击更新按钮:
至此,在Ubuntu 18.04服务器上安装Mailtrain及配置完成。
相关主题 |