|
本文介绍在Ubuntu 18.04 LTS操作系统上安装Postal Mail Server的方法。
简介 Postal是电子邮件传递平台,它是一个功能齐全的完整邮件服务器,可以满足所有网站和Web服务器的电子邮件要求。通过以下步骤可以在Ubuntu 18.04服务器上运行Postal。
第1步:更新Ubuntu 18.04系统 运行以下命令即可: sudo apt update sudo apt -y upgrade sudo apt -y install git sudo reboot
第2步:在Ubuntu 18.04 LTS上安装Ruby 安装Postal邮件服务器需要Ruby,使用以下命令将其安装在Ubuntu 18.04上: sudo apt install software-properties-common sudo apt-add-repository ppa:brightbox/ruby-ng sudo apt update sudo apt install ruby2.3 ruby2.3-dev build-essential 参考:在Ubuntu 18.04 LTS系统上安装Ruby的方法。
第3步:安装MySQL/MariaDB数据库服务器 安装Postal邮件服务器另一个要求是数据库服务器,如果没有安装它,请参考在Ubuntu 18.04系统上安装MariaDB 10.4的步骤安装。 还要安装libmysqlclient-dev: sudo apt -y install libmysqlclient-dev 对于MySQL,请参考以图解的方式在Ubuntu 18.04.1中安装mysql数据库。 安装MariaDB/MySQL数据库服务器后,为Seafile创建用户和数据库。 首次以root用户身份登录MySQL shell: $ mysql -u root -p Enter password: Welcome to the MariaDB monitor. Commands end with ; or \g. Your MariaDB connection id is 48 Server version: 10.3.11-MariaDB-1:10.3.11+maria~bionic-log mariadb.org binary distribution Copyright (c) 2000, 2018, Oracle, MariaDB Corporation Ab and others. Type 'help;' or '\h' for help. Type '\c' to clear the current input statement. MariaDB [(none)]> 我们将为每个服务器组件创建一个数据库: CREATE DATABASE postal CHARSET utf8mb4 COLLATE utf8mb4_unicode_ci; 创建数据库用户并为创建的数据库授予权限: CREATE USER 'postal'@'localhost' IDENTIFIED BY 'StrongPassword'; GRANT ALL ON postal.* TO 'postal'@'localhost'; Postal将处理为你的邮件服务器创建数据库,但需要授予其访问权限,允许用户管理所有以邮件为前缀的数据库: GRANT ALL PRIVILEGES ON `postal-%`.* to `postal`@`localhost` IDENTIFIED BY "StrongPassword"; FLUSH PRIVILEGES; 通过以用户身份登录数据库来确认访问权限: $ mysql -u postal -p Enter password: Welcome to the MariaDB monitor. Commands end with ; or \g. Your MariaDB connection id is 49 Server version: 10.3.11-MariaDB-1:10.3.11+maria~bionic-log mariadb.org binary distribution Copyright (c) 2000, 2018, Oracle, MariaDB Corporation Ab and others. Type 'help;' or '\h' for help. Type '\c' to clear the current input statement. MariaDB [(none)]> SHOW DATABASES; +--------------------+ Database postal +--------------------+ 4 rows in set (0.001 sec) MariaDB [(none)]> QUIT Bye
第4步:安装RabbitMQ Postal得使用到RabbitMQ,请参考在Ubuntu 18.04 LTS系统上安装RabbitMQ服务器的步骤。 你也可以跳过配置RabbitMQ管理仪表板和设置RabbitMQ群集的部分。单个节点RabbitMQ安装应该足够用于小型使用。如果是群集请参考在Ubuntu 18.04 LTS系统上配置RabbitMQ集群的步骤。 Postal需要自己的RabbitMQ vhost和用户连接,使用以下命令创建它们: sudo rabbitmqctl add_vhost /postal sudo rabbitmqctl add_user postal StrongPassword sudo rabbitmqctl set_permissions -p /postal postal ".*" ".*" ".*"
第5步:安装Node.js Node.js没有在Ubuntu 18.04上预先安装,需要手动安装它,参考Ubuntu 16.04安装Node.js一文。
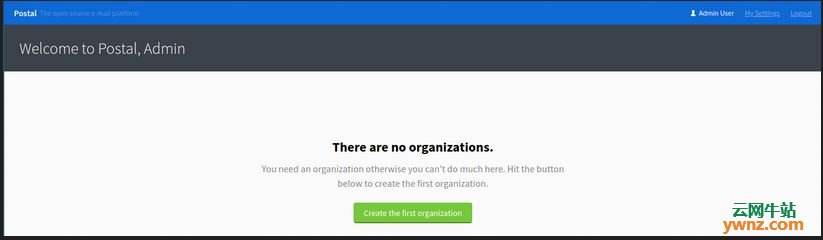
第6步:设置服务器要求 Postal需要在服务器上执行一系列的操作,添加将使用/opt/postal主目录管理Postal Mail服务器的用户: sudo useradd -r -m -d /opt/postal -s /bin/bash postal 允许ruby在Web端口上侦听: sudo setcap 'cap_net_bind_service=+ep' /usr/bin/ruby2.5 安装所需的系统gems: sudo gem install bundler sudo gem install procodile sudo gem install nokogiri -v '1.7.2' 克隆Postal repository: sudo -i -u postal mkdir -p /opt/postal/app wget https://postal.atech.media/packages/stable/latest.tgz -O - | sudo -u postal tar zxpv -C /opt/postal/app 为Postal二进制文件创建一个符号链接: sudo ln -s /opt/postal/app/bin/postal /usr/bin/postal 安装运行应用程序所需的所有必需依赖项 postal bundle /opt/postal/vendor/bundle 生成和修改Postal配置文件。 使用以下命令生成Postal配置文件: # postal initialize-config Created example config file at /opt/postal/config/postal.yml Created new private key for Let's Encrypt Created new signing key for DKIM & HTTP requests Created new private key for default fast server TLS connections Created new self signed certificate for default fast server TLS connections 打开Postal配置文件: vim /opt/postal/config/postal.yml 至少应具有以下设置: web: # The host that the management interface will be available on host: postal.example.com # The protocol that requests to the management interface should happen on protocol: https main_db: # Specify the connection details for your MySQL database host: localhost username: postal password: StrongPassword database: postal message_db: # Specify the connection details for your MySQL server that will be house the # message databases for mail servers. host: localhost username: postal password: StrongPassword prefix: postal rabbitmq: # Specify the connection details for your RabbitMQ server. host: 127.0.0.1 username: postal password: StrongPassword vhost: /postal dns: # Specifies the DNS record that you have configured. Refer to the documentation at # https://github.com/atech/postal/wiki/Domains-&-DNS-Configuration for further # information about these. mx_records: - mx.postal.example.com smtp_server_hostname: postal.example.com spf_include: spf.postal.example.com return_path: rp.postal.example.com route_domain: routes.postal.example.com track_domain: track.postal.example.com smtp: # Specify an SMTP server that can be used to send messages from the Postal management # system to users. You can configure this to use a Postal mail server once the # your installation has been set up. host: 127.0.0.1 port: 2525 username: # Complete when Postal is running and you can password: # generate the credentials within the interface. from_name: Postal from_address: postal@yourdomain.com 编辑文件以适合你的Postal设置。 对于DNS,如果你正在寻找自托管的简单DNS解决方案,则可以使用DnsMasq,参考Linux中使用Dnsmasq部署DNS服务。 完成后初始化数据库和资产: postal initialize 创建初始管理员用户: # postal make-user Postal User Creator Enter the information required to create a new Postal user. This tool is usually only used to create your initial admin user. E-Mail Address : admin@example.com First Name : Admin Last Name : User Initial Password: : ******** User has been created with e-mail address admin@example.com 启动应用程序: 运行以下命令以启动Postal应用程序: # postal start Started Procodile supervisor with PID 31196 你可以随时查看状态: postal status
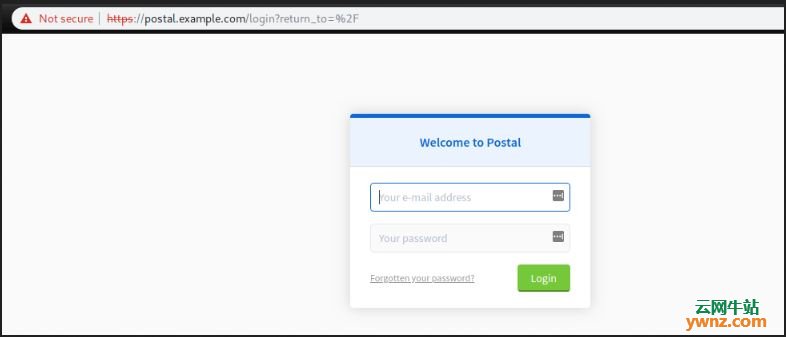
第7步:配置Nginx 安装nginx: sudo apt -y install nginx 配置Nginx: sudo cp /opt/postal/app/resource/nginx.cfg /etc/nginx/sites-available/default 如果有商业版或Let's加密SSL证书,请将它们放在: /etc/nginx/ssl/postal.key --> Private Key /etc/nginx/ssl/postal.cert --> Certificate 如果没有有效的SSL证书,则可以使用自签名SSL证书: sudo mkdir /etc/nginx/ssl/ sudo openssl req -x509 -newkey rsa:4096 -keyout /etc/nginx/ssl/postal.key -out /etc/nginx/ssl/postal.cert -days 365 -nodes 打开文件/etc/nginx/sites-available/default并为Postal设置正确的域名: server_name postal.example.com; 进行更改后重新启动nginx: sudo systemctl restart nginx 访问https://postal.example.com上的Postal管理页面:
使用之前创建的管理员用户:
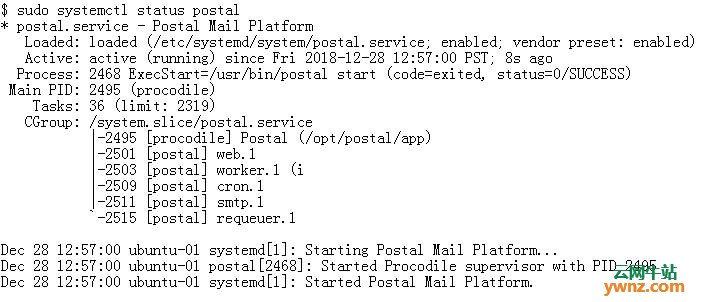
第8步:配置Postal服务以在启动时启动 我们通过运行一个命令来启动邮件服务,该命令使服务在后台运行,如果系统因任何原因重新启动,则不会自动启动该服务。 可以创建用于管理邮政服务的systemd单元文件: sudo vim /etc/systemd/system/postal.service 将以下内容粘贴到文件中: [Unit] Description=Postal Mail Platform After=mysql.service rabbitmq-server.service Wants=mysql.service rabbitmq-server.service [Service] ExecStart=/usr/bin/postal start ExecStop=/usr/bin/postal stop ExecReload=/usr/bin/postal restart User=postal Restart=on-failure Type=forking [Install] WantedBy=mysql.service rabbitmq-server.service 重新加载系统: sudo systemctl daemon-reload 启动并启用postal服务: sudo systemctl enable postal sudo systemctl start postal 你可以使用以下命令确认: $ sudo systemctl status postal
到了这一步,在Ubuntu 18.04 LTS系统上安装和配置Postal服务器就算完成了。
相关主题 |