|
本文介绍在Ubuntu 18.04 Server操作系统上安装Chef Server的详细步骤:更新系统并设置主机名、将AppArmor设置为Complaining或disabled模式、配置本地邮件及NTP、下载并安装Chef server软件包。
第1步:更新系统并设置主机名 请运行以下命令更新系统包括安装curl wget: sudo apt update sudo apt install curl wget 设置服务器主机名(请注意更改自己的域名): sudo hostnamectl set-hostname chef-server.example.com 如果有活动的DNS服务器,请相应地设置A记录,对于没有DNSserver的安装,请在/etc/hosts文件中设置记录: 192.168.18.39 chef-server.example.com
第2步:将AppArmor设置为Complaining或disabled模式 在Ubuntu 18.04默认情况下,AppArmor在强制模式下启用,Chef没有运行AppArmor的配置文件,因此必须将其设置为Complaining模式或disabled。 检查AppArmor是否已启用: $ sudo apparmor_status apparmor module is loaded. 16 profiles are loaded. 16 profiles are in enforce mode. /sbin/dhclient /usr/bin/lxc-start /usr/bin/man /usr/lib/NetworkManager/nm-dhcp-client.action /usr/lib/NetworkManager/nm-dhcp-helper /usr/lib/connman/scripts/dhclient-script /usr/lib/snapd/snap-confine /usr/lib/snapd/snap-confine//mount-namespace-capture-helper /usr/sbin/haveged /usr/sbin/tcpdump lxc-container-default lxc-container-default-cgns lxc-container-default-with-mounting lxc-container-default-with-nesting man_filter man_groff 0 profiles are in complain mode. 1 processes have profiles defined. 1 processes are in enforce mode. /usr/sbin/haveged (802) 0 processes are in complain mode. 0 processes are unconfined but have a profile defined. 如果响应不是0进程处于强制模式或0配置文件处于强制模式,则将其设置为Complaining模式。 要将AppArmor设置为Complaining模式,请运行: sudo aa-complain /etc/apparmor.d/* 要完全禁用AppArmor,请运行: sudo invoke-rc.d apparmor kill sudo update-rc.d -f apparmor remove 重新检查状态: sudo apparmor_status
第3步:配置本地邮件 Chef server使用电子邮件发送各种事件的通知,如密码重置、用户邀请、故障转移通知、作业通知失败等。配置本地邮件请参考在Ubuntu 18.04系统上安装和配置Postfix作为SMTP服务器一文。
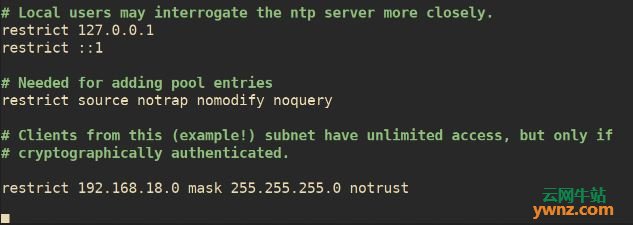
第4步:配置NTP Chef server要求运行它的系统连接到网络时间协议(NTP),同时你可以先参考在Linux系统下安装配置Chrony,使其成为NTP客户端替代品一文: 在Ubuntu 18.04上安装ntp,命令如下: sudo apt install ntp 你可以选择编辑/etc/ntp.conf以在附近添加NTP服务器,要限制对NTP服务器的访问,例如从Chef客户端节点,请设置如下所示: restrict 192.168.18.0 mask 255.255.255.0 nomodify notrap
进行更改后重新启动ntp服务: sudo systemctl restart ntp 如果启用了UFW防火墙,请设置允许ntp端口: sudo ufw allow ntp 显示ntp状态: sudo ntpq -p 在Chef客户端上,安装ntp并将NTP服务器设置为Chef服务器IP地址: sudo apt install ntp sudo vim /etc/ntp.conf 取消注释NTP服务器行并指定Chef服务器IP地址: #pool 0.ubuntu.pool.ntp.org iburst #pool 1.ubuntu.pool.ntp.org iburst #pool 2.ubuntu.pool.ntp.org iburst #pool 3.ubuntu.pool.ntp.org iburst server 192.168.18.39
第5步:下载并安装Chef server软件包 Chef下载地址,目前最新版本为Chef Server 12.18.14,在终端中下载: wget https://packages.chef.io/files/stable/chef-server/12.18.14/ubuntu/18.04/chef-server-core_12.18.14-1_amd64.deb 下载完成后,使用dpkg命令安装软件包 sudo dpkg -i chef-server-core_12.18.14-1_amd64.deb 输出信息如下: $ sudo dpkg -i chef-server-core_12.18.14-1_amd64.deb Selecting previously unselected package chef-server-core. (Reading database ... 105387 files and directories currently installed.) Preparing to unpack chef-server-core_12.18.14-1_amd64.deb ... Unpacking chef-server-core (12.18.14-1) ... Setting up chef-server-core (12.18.14-1) ... 等待安装完成,然后配置Chef Server: sudo chef-server-ctl reconfigure 由于配置了许多服务,因此此步骤可能需要几分钟才能完成。 1、创建管理员帐户 格式为: sudo chef-server-ctl user-create USER_NAME FIRST_NAME LAST_NAME EMAIL 'PASSWORD' --filename FILE_NAME 1]、自动生成RSA私钥。 2]、这是用户的私钥,应保存到安全位置。 3]、选项--filename将RSA私钥保存到指定的绝对路径。 比如: sudo chef-server-ctl user-create chefadmin Chef Admin \ chefadmin@example.co 'StrongPassword' \ --filename /home/chefadmin.pem 另外,创建一个组织,syntax是: sudo chef-server-ctl org-create short_name 'full_organization_name' --association_user user_name --filename ORGANIZATION-validator.pem 1]、名称必须以小写字母或数字开头。 2]、全名必须以非空白字符开头。 3]、--association_user选项将user_name与Chef server上的admins安全组相关联。 4]、自动生成RSA私钥。这是厨师验证器密钥,应保存到安全位置。 5]、--filename选项将RSA私钥保存到指定的绝对路径。 比如: chef-server-ctl org-create mycompany 'Company X, Inc.' \ --association_user chefadmin \ --filename /home/mycompany-validator.pem 生成的密钥应该在/home目录中可用: # ls /home/ chefadmin.pem mycompany-validator.pem 2、安装Chef Manage Chef Manage是一个高级附加组件,提供用于管理常见Chef server任务的图形用户界面,最多25个节点可免费使用。 我们来安装管理控制台,运行以下命令: sudo chef-server-ctl install chef-manage sudo chef-server-ctl reconfigure sudo chef-manage-ctl reconfigure 你还可以从.deb包安装Chef Manage: wget https://packages.chef.io/files/stable/chef-manage/2.5.16/ubuntu/16.04/chef-manage_2.5.16-1_amd64.deb sudo dpkg -i chef-manage_2.5.16-1_amd64.deb sudo chef-manage-ctl reconfigure 所有Chef Server服务都将在用户名/组opscode下运行,PostgreSQL的用户名是opscode-pgsql。 如果希望使用或已经使用UFW防火墙,请通过运行以下命令打开端口80和443: sudo ufw allow proto tcp from any to any port 80,443 到这一步,将能够使用地址如https://serverip/login访问Chef Web管理中心:
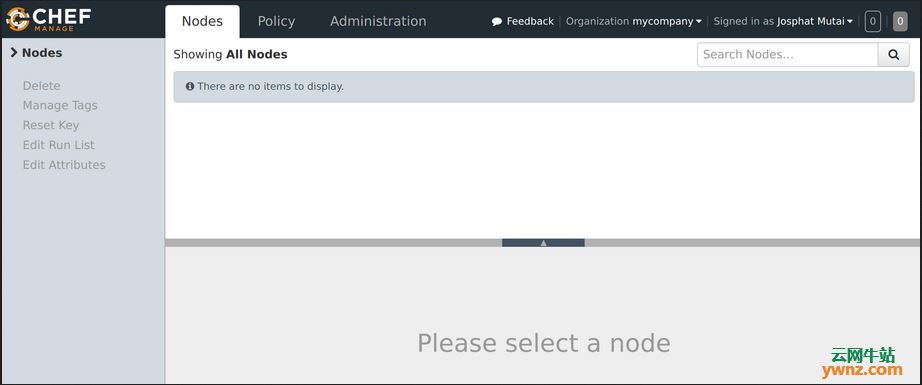
用之前添加的用户名登录,Chef Server管理中心如下图:
至此,你已成功在Ubuntu 18.04系统上安装Chef Server了。
相关主题 |