|
本文介绍在Ubuntu 18.04/Ubuntu 16.04系统上安装和配置OpenVPN Server的简便方法:这是一种脚本化的方式,通过手动过程设置OpenVPN对于没有Linux和VPN经验的新用户来说尤其具有挑战性,所以本文采用的都是简单易行的方法,这种方法适用于Debian系列发行版和Red Hat系列,本文特定于Ubuntu 18.04和Ubuntu 16.04,但其他发行版的设置过程类似。在开始在Ubuntu服务器上安装任何软件包之前,我们始终建议确保更新所有系统软件包,运行以下命令: $ sudo apt-get update $ sudo apt-get upgrade
一、安装git 通过运行命令安装git: $ sudo apt-get install git 参考:在Ubuntu 18.04系统下安装和初次使用Git。
二、Clone openvpn-install存储库 现在使用上面安装的git工具Clone openvpn-install存储库: $ cd ~ $ git clone https://github.com/Nyr/openvpn-install.git Cloning into 'openvpn-install'... remote: Counting objects: 345, done. remote: Total 345 (delta 0), reused 0 (delta 0), pack-reused 345 Receiving objects: 100% (345/345), 99.15 KiB | 681.00 KiB/s, done. Resolving deltas: 100% (170/170), done.
三、更改为openvpn-install并运行OpenVPN安装程序 cd到clone创建的directoryopenvpn-install并运行安装程序脚本: $ cd openvpn-install/ $ ls -1 LICENSE.txt README.md openvpn-install.sh $ chmod +x openvpn-install.sh $ sudo ./openvpn-install.sh 将收到一些提示,以更改或确认安装的默认设置: Welcome to this OpenVPN "road warrior" installer! I need to ask you a few questions before starting the setup. You can leave the default options and just press enter if you are ok with them. First, provide the IPv4 address of the network interface you want OpenVPN listening to. IP address: 192.168.10.2 Which protocol do you want for OpenVPN connections? 1) UDP (recommended) 2) TCP Protocol [1-2]: 1 What port do you want OpenVPN listening to? Port: 1194 Which DNS do you want to use with the VPN? 1) Current system resolvers 2) 1.1.1.1 3) Google 4) OpenDNS 5) Verisign DNS [1-5]: 1 Finally, tell me your name for the client certificate. Please, use one word only, no special characters. Client name: client Okay, that was all I needed. We are ready to set up your OpenVPN server now. Press any key to continue... <Enter> 在回答完所有问题后按<Enter>键开始安装过程,如果安装成功,应该在结束时收到成功的消息:
主OpenVPN服务器配置文件是/etc/openvpn/server.conf,可以根据自己的喜好自由调整和调整它: $ cat /etc/openvpn/server.conf port 1194 proto udp dev tun sndbuf 0 rcvbuf 0 ca ca.crt cert server.crt key server.key dh dh.pem auth SHA512 tls-auth ta.key 0 topology subnet server 10.8.0.0 255.255.255.0 ifconfig-pool-persist ipp.txt push "redirect-gateway def1 bypass-dhcp" push "dhcp-option DNS 8.8.8.8" push "dhcp-option DNS 8.8.4.4" keepalive 10 120 cipher AES-256-CBC comp-lzo user nobody group nogroup persist-key persist-tun status openvpn-status.log verb 3 crl-verify crl.pem 将在安装过程中创建tun0虚拟接口,这由OpenVPN客户端子网使用,使用以下方法确认: $ ip ad | grep tun0 4: tun0: <POINTOPOINT,MULTICAST,NOARP,UP,LOWER_UP> mtu 1500 qdisc fq_codel state UNKNOWN group default qlen 100 inet 10.8.0.1/24 brd 10.8.0.255 scope global tun0 此接口的默认子网为10.8.0.0/24.OpenVPN服务器将分配10.8.0.1 IP地址: $ ip route | grep tun0 10.8.0.0/24 dev tun0 proto kernel scope link src 10.8.0.1 要测试这个,请使用: $ sudo apt-get install traceroute 然后: $ traceroute 10.8.0.1 traceroute to 10.8.0.1 (10.8.0.1), 30 hops max, 60 byte packets 1 node-01.computingforgeeks.com (10.8.0.1) 0.050 ms 0.018 ms 0.019 ms
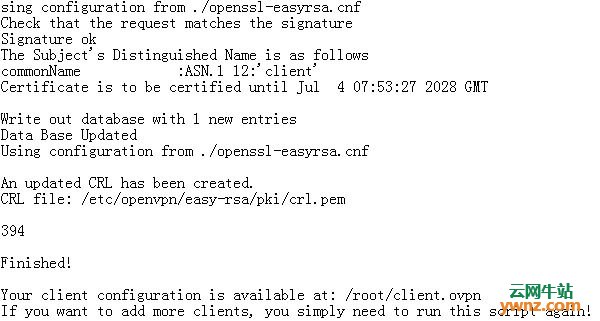
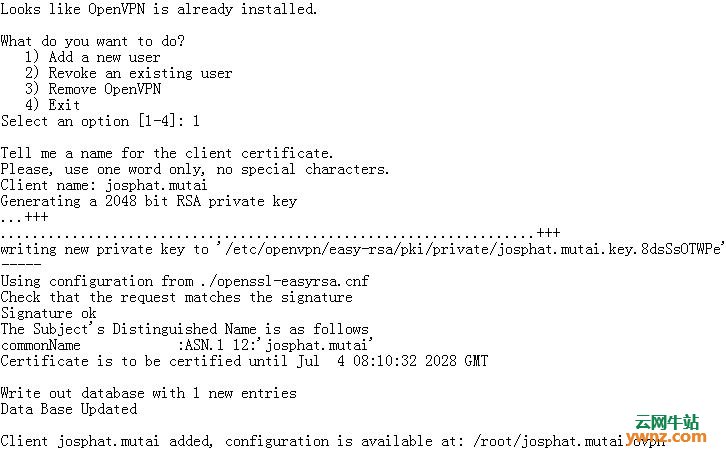
四、生成OpenVPN用户配置文件(.ovpn文件) 完成上面的三步后,你的VPN服务器就可以使用了,我们需要生成供用户使用的VPN配置文件,我们将使用与安装相同的脚本,它管理用户配置文件的创建和撤销: # ./openvpn-install.sh
从输出中,你可以确认我的配置文件的位置/root/josphat.mutai.ovpn,你需要将此配置文件复制给用户,还提供了相关私钥的位置/etc/openvpn/easy-rsa/pki/private/josphat.mutai.key.8dsSsOTWPe。 附:从客户端连接到OpenVPN服务器的说明 你可以使用选择的VPN客户端在操作系统上配置OpenVPN客户端,参考搭建VPN工具Algo,Streisand,OpenVPN,StrongSwan,SoftEther,WireGuard,安装完成后,在Windows上,导航到包含ovpn配置文件的目录,右键单击文件名并选择在此配置文件上启动OpenVPN:
对于Linux用户,可以使用NetworkManager和openvpn插件连接到OpenVPN服务器,参考使用nmcli连接到Linux系统中的OpenVPN Server。
相关主题 |