|
本文介绍在Ubuntu 18.04系统上安装和配置Cacti的方法。Cacti是一个完全开源的网络监控和图形工具,被设计为行业标准数据记录工具RRDtool的前端应用程序,Cacti使用RRDTool的数据存储和图形功能,它提供直观且易于使用的Web界面,可用于小型LAN安装,直至具有数千台服务器和网络设备的复杂网络。
一、更新系统并升级所有包、安装php和所需的模块 1、更新系统并升级所有包 我们从服务器包升级开始,以避免任何依赖性问题: sudo apt-get update sudo apt-get upgrade 2、安装php和所需的模块 我们现在需要安装php和cacti所需的一些php模块,运行以下命令以获取所有内容并进行安装: $ sudo apt-get -y install php php-mysql php-curl php-net-socket \ php-gd php-intl php-pear php-imap php-memcache libapache2-mod-php \ php-pspell php-recode php-tidy php-xmlrpc php-snmp \ php-mbstring php-gettext php-gmp php-json php-xml php-common 最重要的模块是php-snmp和php-mysql,确保它们已安装,同时可以使用php -v命令来查看所安装的PHP版本,要安装7.3版本请参考在Ubuntu 18.04或CentOS 7系统上安装PHP 7.3一文。 确保设置正确的时区: # grep date.timezone /etc/php/7.2/apache2/php.ini ; http://php.net/date.timezone date.timezone = "Asia/Shanghai"
二、安装Apache Web服务器 Cacti的默认推荐Web服务器是Apache,使用以下命令安装它: sudo apt-get -y install apache2 安装Apache后,仅允许Prod ServerTokens配置基本安全性: sudo vim /etc/apache2/conf-enabled/security.conf 改变第25行: ServerTokens Prod 该指令将你返回的内容配置为服务器HTTP响应,有效选项为Full | OS | Minimal | Minor | Major | Prod。 设置ServerName: # grep ServerName /etc/apache2/apache2.conf ServerName cacti.computingforgeeks.com 设置Server Admin以在出现问题时接收电子邮件: # grep ServerAdmin /etc/apache2/apache2.conf ServerAdmin adminuser@computingforgeeks.com 如果已启用ufw,请在防火墙上打开http和https端口: # ufw allow http Rule added Rule added (v6 # ufw allow https Rule added Rule added (v6) 进行这些更改后,需要重新启动Apache Web服务: $ sudo systemctl restart apache2
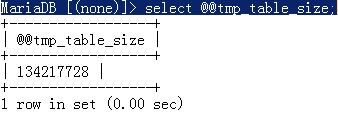
三、安装MariaDB服务器 要在Ubuntu上安装MariaDB,参考在Ubuntu 18.04系统上安装MariaDB 10.4的步骤。 调整Cacti的MariaDB数据库,在文件/e/etc/mysql/mariadb.cnf上的[mysqld]下添加以下设置: max_heap_table_size=128M tmp_table_size=128M join_buffer_size=64M innodb_buffer_pool_size=512M innodb_doublewrite=OFF innodb_flush_log_at_timeout=3 innodb_read_io_threads=32 innodb_write_io_threads=16 重启mariadb服务: $ sudo systemctl restart mysql 要检查这些设置中的任何一个,请使用mysql select语句,例如: MariaDB [(none)]> select @@tmp_table_size;
要么: MariaDB [(none)]> show variables like 'join_buffer_size'; 完成数据库服务器安装后,需要为Cacti创建一个数据库: $ mysql -u root -p Welcome to the MariaDB monitor. Commands end with ; or \g. Your MariaDB connection id is 56 Server version: 10.3.7-MariaDB-1:10.3.7+maria~bionic-log mariadb.org binary distribution Copyright (c) 2000, 2018, Oracle, MariaDB Corporation Ab and others. Type 'help;' or '\h' for help. Type '\c' to clear the current input statement. MariaDB [(none)]> create database cacti; Query OK, 1 row affected (0.000 sec) MariaDB [(none)]> grant all privileges on cacti.* to cacti_user@'localhost' identified by 'strongpassword'; Query OK, 0 rows affected (0.001 sec) MariaDB [(none)]> flush privileges; Query OK, 0 rows affected (0.001 sec) MariaDB [(none)]> exit Bye 测试数据库连接: $ mysql -u cacti_user -p Enter password: Welcome to the MariaDB monitor. Commands end with ; or \g. Your MariaDB connection id is 178 Server version: 10.1.29-MariaDB-6 Ubuntu 18.04 Copyright (c) 2000, 2017, Oracle, MariaDB Corporation Ab and others. Type 'help;' or '\h' for help. Type '\c' to clear the current input statement. MariaDB [(none)]> show databases; Database cacti information_schema 2 rows in set (0.00 sec) MariaDB [(none)]>
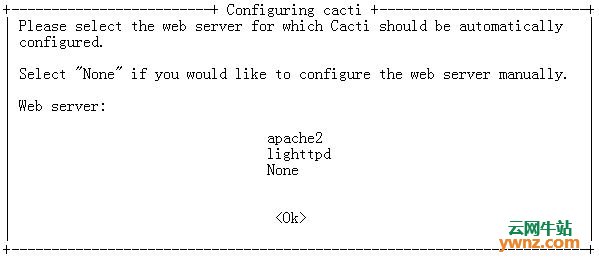
四、安装SNMP和Cacti 最后一个软件包安装步骤适用于Cacti和snmp软件包,Cacti依靠Snmp和rrdtool工具来实现其功能,使用以下命令安装这些软件包: sudo apt-get install snmp snmpd snmp-mibs-downloader rrdtool cacti cacti-spine 当要求选择Web服务器时,请选择Apache:
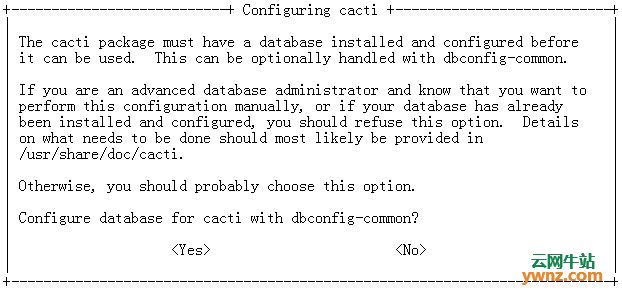
对于数据库配置,请为手动配置选择no,因为我们已为cacti on创建了数据库:
等待安装完成,然后继续配置SNMP。
五、配置SNMP 首先通过在/etc/snmp/snmp.conf上注释掉以下行来启用MIB的加载。 更改: mibs : 至: # mibs : 通过编辑/etc/snmp/snmpd.conf配置SNMP团体名称: # On line 49 - Uncomment and change to the name of community string to any name you like. # This enable full access from localhost rocommunity Computingforgeeks localhost 通过评论以下线条进行可靠的公共访问: rocommunity public default -V systemonly rocommunity6 public default -V systemonly 至: # rocommunity public default -V systemonly # rocommunity6 public default -V systemonly 重启snmpd服务: $ sudo systemctl restart snmpd 使用snmpwalk命令行工具验证snmp配置: $ sudo snmpwalk -v 2c -c Computingforgeeks localhost system SNMPv2-MIB::sysDescr.0 = STRING: Linux cacti 4.15.0-22-generic SNMPv2-MIB::sysObjectID.0 = OID: NET-SNMP-MIB::netSnmpAgentOIDs.10 DISMAN-EVENT-MIB::sysUpTimeInstance = Timeticks: (11034) 0:01:50.34 SNMPv2-MIB::sysContact.0 = STRING: Me <me@example.org> SNMPv2-MIB::sysName.0 = STRING: cacti SNMPv2-MIB::sysLocation.0 = STRING: Sitting on the Dock of the Bay SNMPv2-MIB::sysServices.0 = INTEGER: 72 SNMPv2-MIB::sysORLastChange.0 = Timeticks: (1) 0:00:00.01 SNMPv2-MIB::sysORID.1 = OID: SNMP-MPD-MIB::snmpMPDCompliance SNMPv2-MIB::sysORID.2 = OID: SNMP-USER-BASED-SM-MIB::usmMIBCompliance SNMPv2-MIB::sysORID.3 = OID: SNMP-FRAMEWORK-MIB::snmpFrameworkMIBCompliance SNMPv2-MIB::sysORID.4 = OID: SNMPv2-MIB::snmpMIB SNMPv2-MIB::sysORID.5 = OID: SNMP-VIEW-BASED-ACM-MIB::vacmBasicGroup SNMPv2-MIB::sysORID.6 = OID: TCP-MIB::tcpMIB SNMPv2-MIB::sysORID.7 = OID: IP-MIB::ip SNMPv2-MIB::sysORID.8 = OID: UDP-MIB::udpMIB SNMPv2-MIB::sysORID.9 = OID: SNMP-NOTIFICATION-MIB::snmpNotifyFullCompliance SNMPv2-MIB::sysORID.10 = OID: NOTIFICATION-LOG-MIB::notificationLogMIB SNMPv2-MIB::sysORDescr.1 = STRING: The MIB for Message Processing and Dispatching. SNMPv2-MIB::sysORDescr.2 = STRING: The management information definitions for the SNMP User-based Security Model. SNMPv2-MIB::sysORDescr.3 = STRING: The SNMP Management Architecture MIB. SNMPv2-MIB::sysORDescr.4 = STRING: The MIB module for SNMPv2 entities SNMPv2-MIB::sysORDescr.5 = STRING: View-based Access Control Model for SNMP. SNMPv2-MIB::sysORDescr.6 = STRING: The MIB module for managing TCP implementations SNMPv2-MIB::sysORDescr.7 = STRING: The MIB module for managing IP and ICMP implementations SNMPv2-MIB::sysORDescr.8 = STRING: The MIB module for managing UDP implementations SNMPv2-MIB::sysORDescr.9 = STRING: The MIB modules for managing SNMP Notification, plus filtering. SNMPv2-MIB::sysORDescr.10 = STRING: The MIB module for logging SNMP Notifications. SNMPv2-MIB::sysORUpTime.1 = Timeticks: (1) 0:00:00.01 SNMPv2-MIB::sysORUpTime.2 = Timeticks: (1) 0:00:00.01 SNMPv2-MIB::sysORUpTime.3 = Timeticks: (1) 0:00:00.01 SNMPv2-MIB::sysORUpTime.4 = Timeticks: (1) 0:00:00.01 SNMPv2-MIB::sysORUpTime.5 = Timeticks: (1) 0:00:00.01 SNMPv2-MIB::sysORUpTime.6 = Timeticks: (1) 0:00:00.01 SNMPv2-MIB::sysORUpTime.7 = Timeticks: (1) 0:00:00.01 SNMPv2-MIB::sysORUpTime.8 = Timeticks: (1) 0:00:00.01 SNMPv2-MIB::sysORUpTime.9 = Timeticks: (1) 0:00:00.01 SNMPv2-MIB::sysORUpTime.10 = Timeticks: (1) 0:00:00.01 请记住使用社区字符串的名称替换Computingforgeeks。
六、配置Cacti服务器 从这里开始,我们必须为Cacti配置数据库设置并在Web界面上启动设置,更改文件/usr/share/cacti/site/include/config.php上的数据库设置: # On line 49 - Change cacti database connection info $database_type = "mysqli"; $database_default = "cacti"; $database_hostname = "localhost"; $database_username = "cacti_user"; $database_password = "strongpassword"; $database_port = "3306"; $database_ssl = false; 将cacti_user替换为你在步骤3中创建的数据库用户和使用cacti数据库用户密码的strongpassword。 导入cacti Mysql数据库架构: $ mysql -u cacti_user -p cacti < /usr/share/doc/cacti/cacti.sql Enter password: 将cacti_user替换为数据库用户,将cacti替换为数据库名称。 为cacti数据库用户设置mysql时区: # mysql_tzinfo_to_sql /usr/share/zoneinfo | mysql -u root -p mysql Enter password: Warning: Unable to load '/usr/share/zoneinfo/leap-seconds.list' as time zone. Skipping it. 授予cacti MySQL数据库用户访问TimeZone数据库的权限: # mysql -u root -p Enter password: Welcome to the MariaDB monitor. Commands end with ; or \g. Your MariaDB connection id is 202 Server version: 10.1.29-MariaDB-6 Ubuntu 18.04 Copyright (c) 2000, 2017, Oracle, MariaDB Corporation Ab and others. Type 'help;' or '\h' for help. Type '\c' to clear the current input statement. MariaDB [(none)]> MariaDB [(none)]> GRANT SELECT ON mysql.time_zone_name TO cacti_user@localhost; Query OK, 0 rows affected (0.00 sec) MariaDB [(none)]> flush privileges; Query OK, 0 rows affected (0.00 sec) MariaDB [(none)]> exit Bye 然后配置Cacti apache站点访问控制(可选): 如果你想限制对Cacti Web界面的访问,请编辑文件/etc/apache2/conf-available/cacti.conf并注释掉该行: Require all granted 然后配置如下: # Change line 7 #Require all granted Require host localhost Require ip 192.168.1.0/24 将192.168.1.0/24替换为你的可信子网,你还可以添加如下所示的单个IP: Require ip 192.168.1.20 Require ip 172.16.20.30 进行上述修改后,需要重启apache服务: $ sudo systemctl restart apache2 设置目录权限: sudo chown -R www-data:www-data /opt/cacti/
七、启动初始Cacti设置 打开Web浏览器,然后从Cacti服务器上授权的客户端系统导航到http://(Cacti服务器的主机名或IP地址)/cacti/:
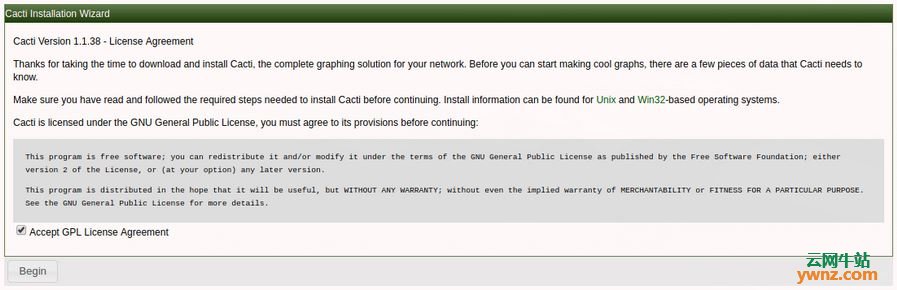
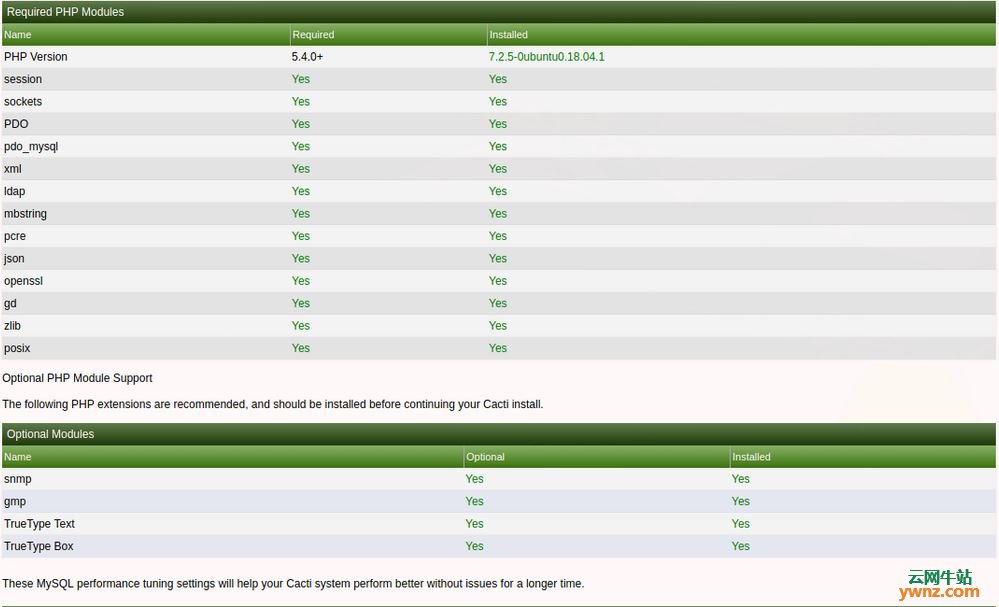
勾选接受GPL许可协议,然后单击开始按钮继续,Cacti将检查是否满足所有要求,你可能需要根据警告级别进行一些更改:
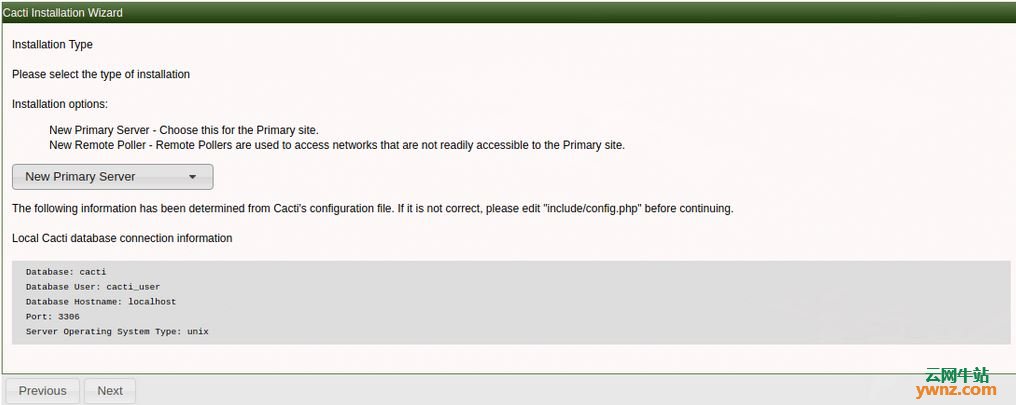
单击下一步按钮转到下一个阶段。 系统将要求你选择服务器安装类型: 新主服务器 - 为主站点选择此项。 新的远程轮询器 - 远程轮询器用于访问主站点不易访问的网络。 由于这是我们的第一台服务器,请选择“新主服务器”,然后单击“下一步”:
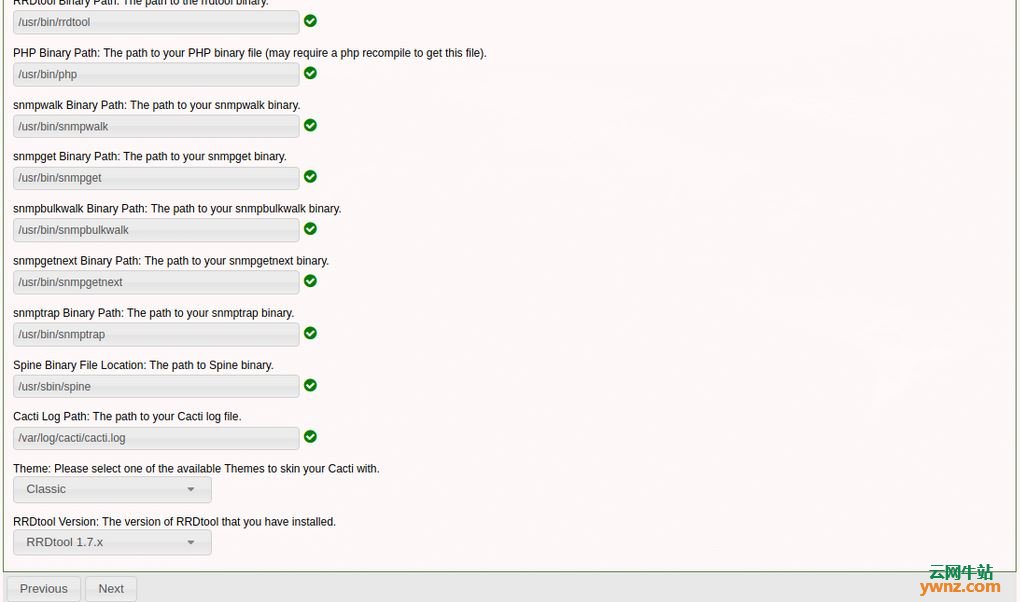
确认所有二进制文件都已找到并单击“下一步”:
记下安装后需要具有只读权限的目录,然后单击“下一步”:
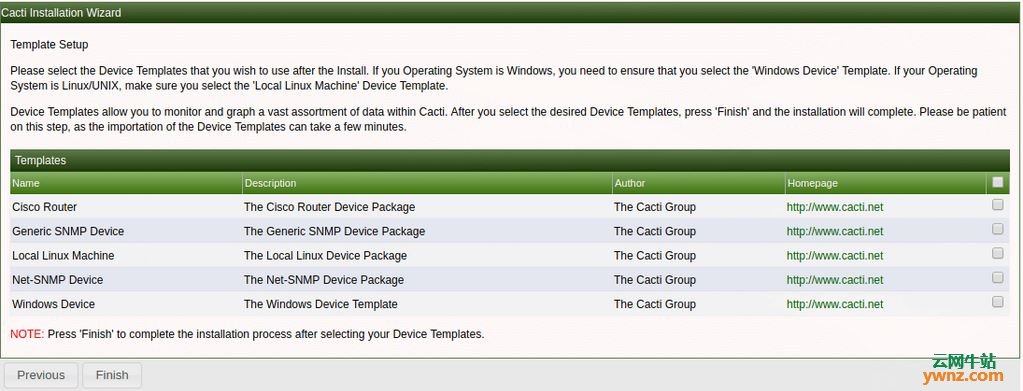
你现在处于最后阶段,单击完成按钮完成安装以获取登录页面:
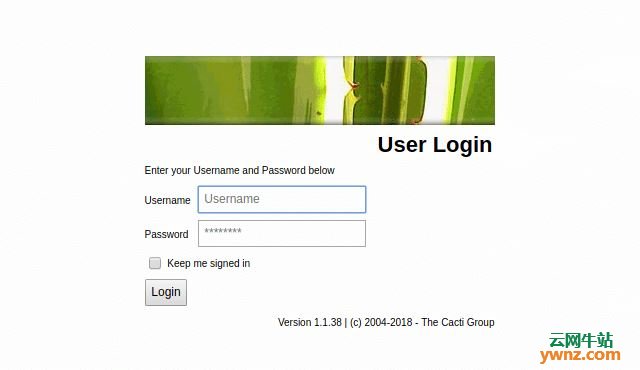
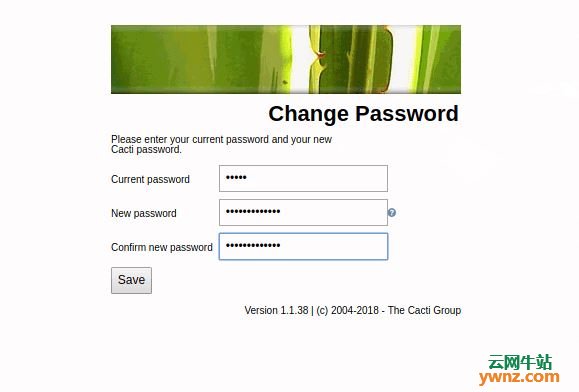
默认登录名是: 用户名:admin 密码:admin 当系统提示您更改admin用户的密码时,请提供新密码并确认:
然后,你将可以访问Cacti界面,如下所示:
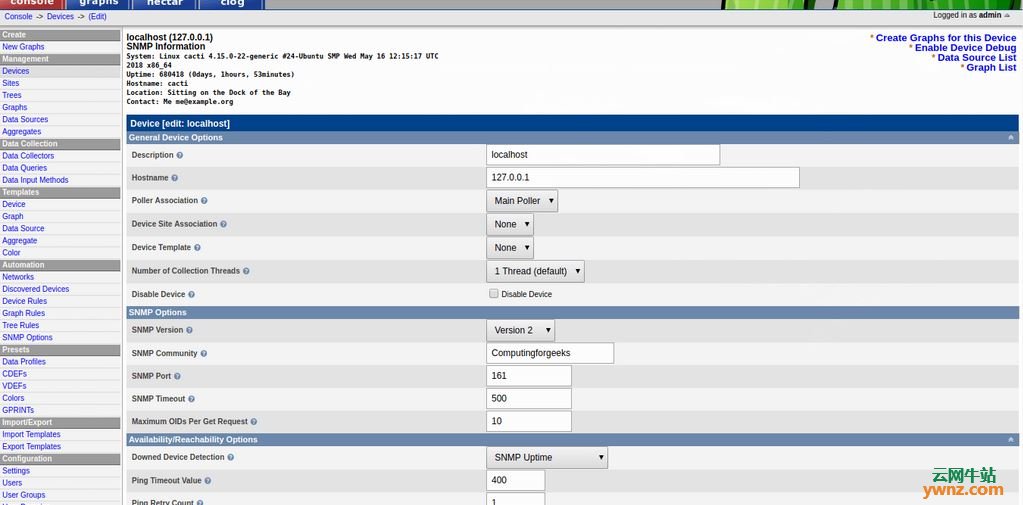
八、监控本地Cacti服务器 添加本地Cacti服务器以进行监控,以管理员用户身份登录Cacti,然后转到Console > Devices > + (Add device):
填写服务器详细信息并向下滚动,然后单击保存按钮。
相关主题 |