|
本文介绍使用Nginx和Letsencrypt SSL在Ubuntu 18.04系统上安装和配置Askbot的方法,安装需要MySQL/MariaDB/PostgreSQL数据库、uWSGI及Nginx Web服务器。
一、安装Askbot依赖项 首先安装所有必需的依赖项,这将是python包和pip包管理器。 更新和升级系统包: sudo apt-get update && sudo apt-get upgrade 安装python依赖项: sudo apt-get install -y python-dev python-setuptools python-pip libmysqlclient-dev
二、安装和配置数据库 对于数据库服务器,我们将使用MariaDB数据库,参考在Ubuntu 18.04系统上安装MariaDB 10.4的步骤。 如果你对使用MySQL服务器感兴趣,请参考在Ubuntu 18.04/16.04命令行上安装MySQL 8.0.11的全过程。 安装数据库服务器后,为Askbot创建数据库和关联用户: root@node-02:~# mysql -u root -p Enter password: Welcome to the MariaDB monitor. Commands end with ; or \g. Your MariaDB connection id is 21 Server version: 10.3.7-MariaDB-1:10.3.7+maria~bionic mariadb.org binary distribution MariaDB [(none)]> CREATE DATABASE askbot_db; Query OK, 1 row affected (0.000 sec) MariaDB [(none)]> create user askbot@localhost identified by 'Password'; Query OK, 0 rows affected (0.000 sec) MariaDB [(none)]> grant all privileges on askbot_db.* to askbot@localhost; Query OK, 0 rows affected (0.00 sec) MariaDB [(none)]> flush privileges; Query OK, 0 rows affected (0.000 sec) MariaDB [(none)]> exit
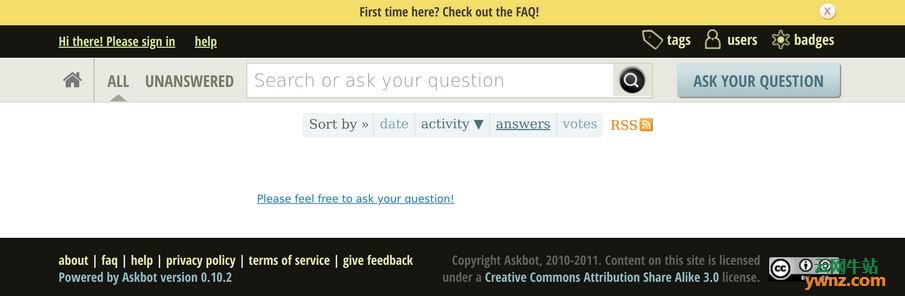
三、安装和配置Askbot 现在我们已经安装了需要安装Askbot的软件包,并且我们已准备好数据库,让我们安装Askbot应用程序,我们将使用Python Virtualenv。 首先创建askbot用户: root@node-02:~# adduser askbot Adding user `askbot' ... Adding new group `askbot' (1000) ... Adding new user `askbot' (1000) with group `askbot' ... Creating home directory `/home/askbot' ... Copying files from `/etc/skel' ... New password: Retype new password: passwd: password updated successfully Changing the user information for askbot Enter the new value, or press ENTER for the default Full Name []: Room Number []: Work Phone []: Home Phone []: Other []: Is the information correct? [Y/n] y root@node-02:~# id askbot uid=1000(askbot) gid=1000(askbot) groups=1000(askbot) 将askbot用户添加到sudo组: $ sudo usermod -aG sudo askbot 安装virtualenv: $ sudo pip install virtualenv Collecting virtualenv Downloading https://files.pythonhosted.org/packages/b6/30/96a02b2287098b23b875bc8c2f58071c35d2efe84f747b64d523721dc2b5/virtualenv-16.0.0-py2.py3-none-any.whl (1.9MB) 100% |███████████████| 1.9MB 526kB/s Installing collected packages: virtualenv Successfully installed virtualenv-16.0.0 为Askbot内容创建一个目录: # mkdir /srv/askbot # chown askbot:askbot /srv/askbot/ # su - askbot $ cd /srv/askbot/ 安装virtualenv包后,为askbot创建一个虚拟环境: $ virtualenv venv New python executable in /srv/askbot/venv/bin/python Installing setuptools, pip, wheel...done. env开始使用它: $ cd venv/ $ askbot@node-02:/srv/askbot/venv$ source bin/activate (venv) askbot@node-02:/srv/askbot/venv$ 然后安装askbot和mysql python模块: $ pip install askbot gunicorn mysqlclient mysql-python 设置Askbot: (venv) askbot@node-02:/srv/askbot/venv$ mkdir askbot-app (venv) askbot@node-02:/srv/askbot/venv$ cd askbot-app 运行命令askbot-setup来安装askbot。 (venv) askbot@node-02:/srv/askbot/venv/askbot-app$ askbot-setup Deploying Askbot - Django Q&A forum application Problems installing? -> please email admin@askbot.org To CANCEL - hit Ctr-C at any time Enter directory path (absolute or relative) to deploy askbot. To choose current directory - enter "." > . Please select database engine: 1 - for postgresql, 2 - for sqlite, 3 - for mysql, 4 - oracle type 1/2/3/4: 3 Please enter database name (required) > askbot_db Please enter database user (required) > askbot Please enter database password (required) > Password Copying files: * __init__.py * manage.py * urls.py * django.wsgi Creating settings file settings file created copying directories: * doc * cron * upfiles Done. Please find further instructions at http://askbot.org/doc/ 生成静态文件到AskBot安装目录: $ python manage.py collectstatic 如果收到类似“TypeError: Error when calling the metaclass bases”的错误,则会对其进行修复,需要安装版本1.10.0,卸载并安装v1.10.0: (venv) askbot@node-02:/srv/askbot/askbot-app$ pip uninstall six (venv) askbot@node-02:/srv/askbot/askbot-app$ pip install six==1.10.0 完成后,生成静态文件到AskBot安装目录: $ python manage.py collectstatic 键入“yes”并按Enter继续完成文件生成。 然后运行makemigrations并迁移命令: (venv) askbot@node-02:/srv/askbot/askbot-app$ python manage.py makemigrations WARNING!!! You are using a 'locmem' (local memory) caching backend, which is OK for a low volume site running on a single-process server. For a multi-process configuration it is neccessary to have a production cache system, such as redis or memcached. With local memory caching and multi-process setup you might intermittently see outdated content on your site. System check identified some issues: WARNINGS: django_authopenid.UserPasswordQueue.user: (fields.W342) Setting unique=True on a ForeignKey has the same effect as using a OneToOneField. HINT: ForeignKey(unique=True) is usually better served by a OneToOneField. group_messaging.SenderList.recipient: (fields.W342) Setting unique=True on a ForeignKey has the same effect as using a OneToOneField. HINT: ForeignKey(unique=True) is usually better served by a OneToOneField. Migrations for 'askbot': 0013_auto_20190223_1318.py: - Change Meta options on activity - Change Meta options on award - Change Meta options on badgedata - Change Meta options on favoritequestion - Change Meta options on postflagreason - Change Meta options on postrevision - Change Meta options on replyaddress - Change Meta options on repute - Change Meta options on threadtogroup - Change Meta options on vote - Alter field frequency on emailfeedsetting - Alter field primary_language on userprofile 使用optionmigrate生成MySQL数据库: (venv) askbot@node-02:/srv/askbot/askbot-app$ python manage.py migrate 还可以使用: $ python manage.py syncdb ... Synchronizing apps without migrations: Creating tables... Running deferred SQL... Installing custom SQL... Running migrations: No migrations to apply. You have installed Django's auth system, and don't have any superusers defined. Would you like to create one now? (yes/no): yes Username (leave blank to use 'askbot'): askbot Email address: askbot@computingforgeeks.com Password: Password (again): Superuser created successfully. 当脚本询问你是否要创建超级用户时,如果要创建超级用户,请回答yes,默认情况下,Askbot会为自动创建的第一个用户设置管理员状态(超级用户),但也支持此表单。 测试Askbot安装使用: (venv):/srv/askbot/askbot-app$ python manage.py runserver 0.0.0.0:8080 访问你的服务器IP和端口8080,如果一切正常,应该会有如下的仪表板页面:
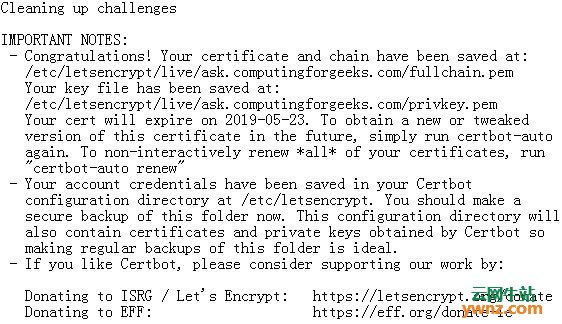
五、安装和配置uWSGI和Nginx 从apt安装uWSGI: $ sudo apt-get install uwsgi 为Askbot创建uwsgi配置文件: $ sudo vim /etc/uwsgi/apps-enabled/askbot.ini 添加内容: [uwsgi] # uwsgi configurations master = true processes = 5 uid = www-data gid=www-data listen.owner = www-data listen.group = www-data # App configurations chdir=/srv/askbot/askbot-app wsgi-file=/srv/askbot/askbot-app/django.wsgi virtualenv=/srv/askbot/venv socket = /srv/askbot/askbot.sock chown-socket = www-data:www-data chmod-socket = 664 vacuum = true die-on-term = true logto = /var/log/uwsgi.log log-master-stream = true 相应地修改文件然后保存。 安装nginx: $ sudo apt-get install nginx 使用www-data作为socket文件所有者重新启动uwsgi服务: $ sudo systemctl restart uwsgi 安装certbot以生成Letsencrypt SSL证书: # wget https://dl.eff.org/certbot-auto -P /usr/local/bin # chmod a+x /usr/local/bin/certbot-auto 生成Letsencrypt SSL证书: # systemctl stop nginx # export DOMAIN='ask.computingforgeeks.com' # export EMAIL="webmaster@computingforgeeks.com" # certbot-auto certonly --standalone -d $DOMAIN \ --preferred-challenges http --agree-tos -n -m $EMAIL \ --keep-until-expiring 如果成功,certbot会给你一个成功的消息,如下图:
创建Nginx配置文件: $ sudo vim /etc/nginx/conf.d/askbot.conf 确保使用有效值替换变量,然后保存文件: # Askbot Nginx cofiguration # cofiguration for https server { listen 443 ssl http2; server_name ask.computingforgeeks.com www.ask.computingforgeeks.com; ssl on; ssl_certificate /etc/letsencrypt/live/ask.computingforgeeks.com/fullchain.pem; ssl_certificate_key /etc/letsencrypt/live/ask.computingforgeeks.com/privkey.pem; ssl_protocols TLSv1 TLSv1.1 TLSv1.2; location /static { alias /srv/askbot/askbot-app/static; } location / { include uwsgi_params; uwsgi_pass unix:/srv/askbot/askbot.sock; } } # http to https redirect server { listen 80; server_name ask.computingforgeeks.com www.ask.computingforgeeks.com; return 301 https://$server_name$request_uri; } 确认语法正确: $ sudo nginx -t nginx: the configuration file /etc/nginx/nginx.conf syntax is ok nginx: configuration file /etc/nginx/nginx.conf test is successful 在进行更改后重新启动uwsgi和nginx服务: $ sudo systemctl restart uwsgi nginx
相关主题 |