|
本文介绍使用LEMP Stack即Nginx在RHEL 8、CentOS 8服务器上安装NextCloud的方法,需要有root权限。要完成本文,请先在RHEL 8上安装LEMP,参考在RHEL 8/CentOS 8上安装LEMP(Nginx、MariaDB、PHP7.2)的方法。
一、在RHEL 8服务器上下载及安装NextCloud 当前版本是NextCloud 15.0.5,可到nextcloud网站下载。 你可以运行以下命令在服务器上下载它,如果出现新版本,只需将15.0.5替换为新版本号即可: wget https://download.nextcloud.com/server/releases/nextcloud-15.0.5.zip 下载后,解压缩下载的文件: yum install unzip unzip nextcloud-15.0.5.zip -d /usr/share/nginx/html/ -d选项指定目标目录,NextCloud Web文件将被解压缩到/usr/share/nginx/nextcloud/,然后我们需要将此目录的所有者更改为nginx,以便Nginx Web服务器可以写入此目录: chown nginx:nginx /usr/share/nginx/html/nextcloud/ -R
二、在MariaDB中创建数据库和用户 使用以下命令登录MariaDB数据库,需要输入MariaDB root密码才能登录: mysql -u root -p 然后为Nextcloud创建一个数据库,本文将数据库命名为nextcloud,可以使用你喜欢的任何名字,比如ywnz也可: create database nextcloud; 创建数据库用户,同样,可以为此用户使用你的首选名称,同时替换密码(your-password): create user nextclouduser@localhost identified by 'your-password'; 授予此用户对nextcloud数据库的所有权限: grant all privileges on nextcloud.* to nextclouduser@localhost identified by 'your-password'; 刷新权限并退出: flush privileges; exit;
三、为Nextcloud创建一个Nginx配置文件 在/etc/nginx/conf.d/目录中创建nextcloud.conf文件,我在本文中使用Nano命令行文本编辑器: nano /etc/nginx/conf.d/nextcloud.conf 将以下文本放入文件中,将nextcloud.your-domain.com、/usr/share/nginx/html/nextcloud/替换为实际数据,在你的DNS管理器中,为NextCloud服务器创建一个子域,如nextcloud.your-domain.com,并且不要忘记为子域设置A记录: server { listen 80; server_name nextcloud.your-domain.com; # Add headers to serve security related headers add_header X-Content-Type-Options nosniff; add_header X-XSS-Protection "1; mode=block"; add_header X-Robots-Tag none; add_header X-Download-Options noopen; add_header X-Permitted-Cross-Domain-Policies none; #This header is already set in PHP, so it is commented out here. #add_header X-Frame-Options "SAMEORIGIN"; # Path to the root of your installation root /usr/share/nginx/html/nextcloud/; location = /robots.txt { allow all; log_not_found off; access_log off; } # The following 2 rules are only needed for the user_webfinger app. # Uncomment it if you're planning to use this app. #rewrite ^/.well-known/host-meta /public.php?service=host-meta last; #rewrite ^/.well-known/host-meta.json /public.php?service=host-meta-json # last; location = /.well-known/carddav { return 301 $scheme://$host/remote.php/dav; } location = /.well-known/caldav { return 301 $scheme://$host/remote.php/dav; } location ~ /.well-known/acme-challenge { allow all; } # set max upload size client_max_body_size 512M; fastcgi_buffers 64 4K; # Disable gzip to avoid the removal of the ETag header gzip off; # Uncomment if your server is build with the ngx_pagespeed module # This module is currently not supported. #pagespeed off; error_page 403 /core/templates/403.php; error_page 404 /core/templates/404.php; location / { rewrite ^ /index.php$uri; } location ~ ^/(?:build|tests|config|lib|3rdparty|templates|data)/ { deny all; } location ~ ^/(?:\.|autotest|occ|issue|indie|db_|console) { deny all; } location ~ ^/(?:index|remote|public|cron|core/ajax/update|status|ocs/v[12]|updater/.+|ocs-provider/.+|core/templates/40[34])\.php(?:$|/) { include fastcgi_params; fastcgi_split_path_info ^(.+\.php)(/.*)$; fastcgi_param SCRIPT_FILENAME $document_root$fastcgi_script_name; fastcgi_param PATH_INFO $fastcgi_path_info; #Avoid sending the security headers twice fastcgi_param modHeadersAvailable true; fastcgi_param front_controller_active true; fastcgi_pass unix:/run/php-fpm/www.sock; fastcgi_intercept_errors on; fastcgi_request_buffering off; } location ~ ^/(?:updater|ocs-provider)(?:$|/) { try_files $uri/ =404; index index.php; } # Adding the cache control header for js and css files # Make sure it is BELOW the PHP block location ~* \.(?:css|js)$ { try_files $uri /index.php$uri$is_args$args; add_header Cache-Control "public, max-age=7200"; # Add headers to serve security related headers (It is intended to # have those duplicated to the ones above) add_header X-Content-Type-Options nosniff; add_header X-XSS-Protection "1; mode=block"; add_header X-Robots-Tag none; add_header X-Download-Options noopen; add_header X-Permitted-Cross-Domain-Policies none; # Optional: Don't log access to assets access_log off; } location ~* \.(?:svg|gif|png|html|ttf|woff|ico|jpg|jpeg)$ { try_files $uri /index.php$uri$is_args$args; # Optional: Don't log access to other assets access_log off; } } 在nano文本编辑器中,按Ctrl+O保存文件,然后按Enter确认,按Ctrl+X退出,然后测试Nginx配置: nginx -t 如果测试成功,请重新加载Nginx以使更改生效: systemctl reload nginx
四、安装并启用PHP模块 运行以下命令以安装NextCloud所需或推荐的PHP模块: yum install php-imagick php-common php-gd php-json php-curl php-zip php-xml php-mbstring php-bz2 php-intl 我们还需要告诉SELinux允许PHP-FPM使用execmem: setsebool -P httpd_execmem 1 然后重新加载PHP-FPM: systemctl reload php-fpm
五、设置权限 首先使SELinux允许Nginx和PHP-FPM读取和写入/usr/share/nginx/html/nextcloud/目录: semanage fcontext -a -t httpd_sys_rw_content_t '/usr/share/nginx/html/nextcloud/' restorecon -v '/usr/share/nginx/html/nextcloud/' -R setsebool -P httpd_unified 1 默认情况下,SELinux禁止Nginx向其他服务器发出网络请求,但后来Nginx需要从Let的加密CA服务器请求TLS证书状态,因此我们需要让SELinux允许Nginx使用以下命令: setsebool -P httpd_can_network_connect 1 默认情况下,/var/lib/php/目录中有3个文件,其组所有者设置为apache,但我们使用的是Nginx,所以我们需要将组所有者从apache更改为nginx: chown root:nginx /var/lib/php/opcache/ chown root:nginx /var/lib/php/session/ chown root:nginx /var/lib/php/wsdlcache/
六、启用HTTPS 现在,可以通过输入Nextcloud安装的域名来访问浏览器中的Nextcloud Web安装向导: nextcloud.your-domain.com
如果无法加载网页,则可能需要在防火墙中打开端口80: firewall-cmd --permanent --zone=public --add-service=http 和443端口,如下: firewall-cmd --permanent --zone=public --add-service=https --permanent选项将使此防火墙规则在系统重新启动后保持不变,接下来,重新加载防火墙守护程序以使更改生效: systemctl reload firewalld 现在应该成功加载NextCloud安装向导,在输入任何信息之前,我们应该在Nextcloud上启用安全的HTTPS连接,我们可以从Let's Encrypt获得免费的TLS证书,参考使用Certbot:在Linux上安装letsencrypt的最简单方法。 从EFF网站下载Let's Encrypt客户端certbot-auto: wget https://dl.eff.org/certbot-auto 授予执行权限: chmod a+x certbot-auto 将其移动到用户的PATH,如/usr/local/bin/,并将其重命名为certbot: sudo mv certbot-auto /usr/local/bin/certbot 我们还需要安装virtualenv Python包,以便Certbot可以创建虚拟环境: pip3 install virtualenv 现在我们可以使用certbot命令使用Nginx插件获取免费的TLS证书: certbot --nginx --agree-tos --redirect --hsts --staple-ocsp --email your-email-address -d nextcloud.your-domain.com 注解: -nginx:使用Nginx身份验证器和安装程序。 -agree-tos:同意让我们加密服务条款。 -redirect:添加301重定向,以便将HTTP请求重定向到HTTPS。 -hsts:将Strict-Transport-Security标头添加到每个HTTP响应中。 -staple-ocsp:启用OCSP Stapling以提高性能和用户隐私。 -d:标志后跟一个域名列表,以逗号分隔,最多可以添加100个域名。 -email:用于注册和恢复联系的电子邮件。 如果这是在RHEL 8/CentOS 8系统上首次运行,可能会要求你安装一些依赖包,按y继续:
系统将询问你是否要接收EFF(Electronic Frontier Foundation)的电子邮件,选择Y或N后,将自动获取并配置你的TLS证书。
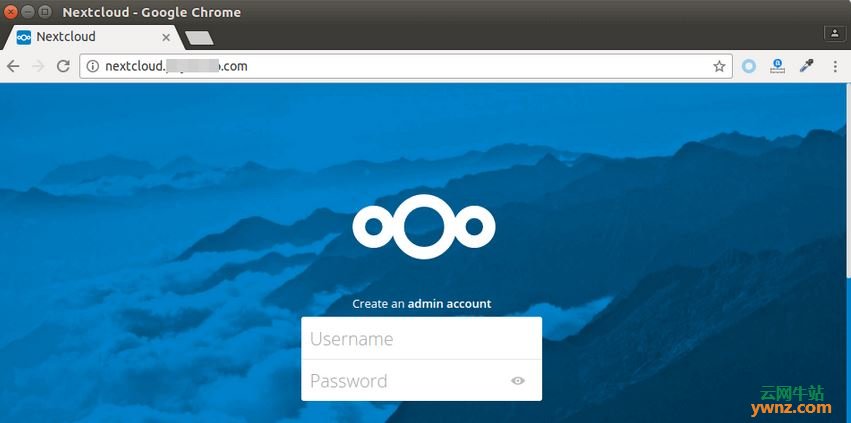
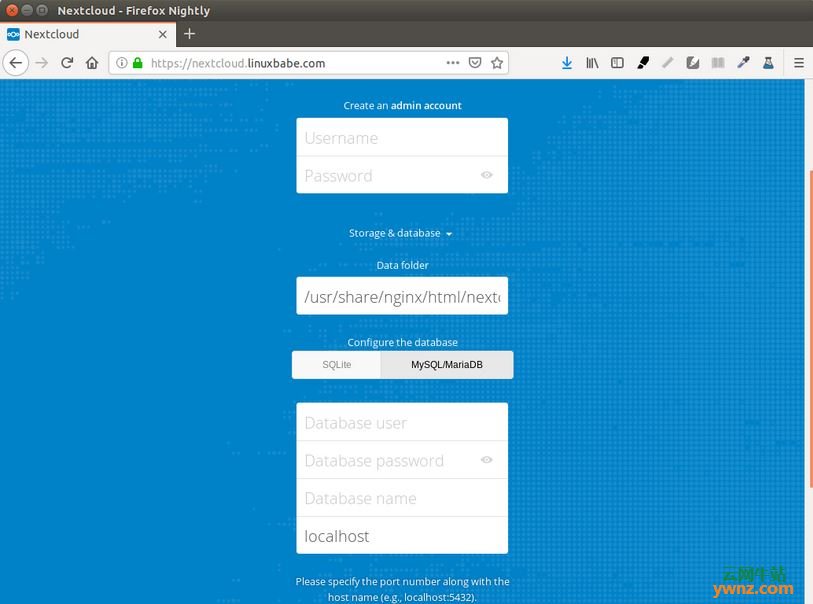
在Web浏览器中完成安装 现在,可以使用HTTPS连接访问Nextcloud Web安装向导,要完成安装,需要创建一个管理员帐户,输入Nextcloud数据文件夹的路径,输入之前创建的数据库详细信息,可以使用默认的localhost作为主机地址,也可以输入localhost:3306,因为MariaDB侦听端口3306:
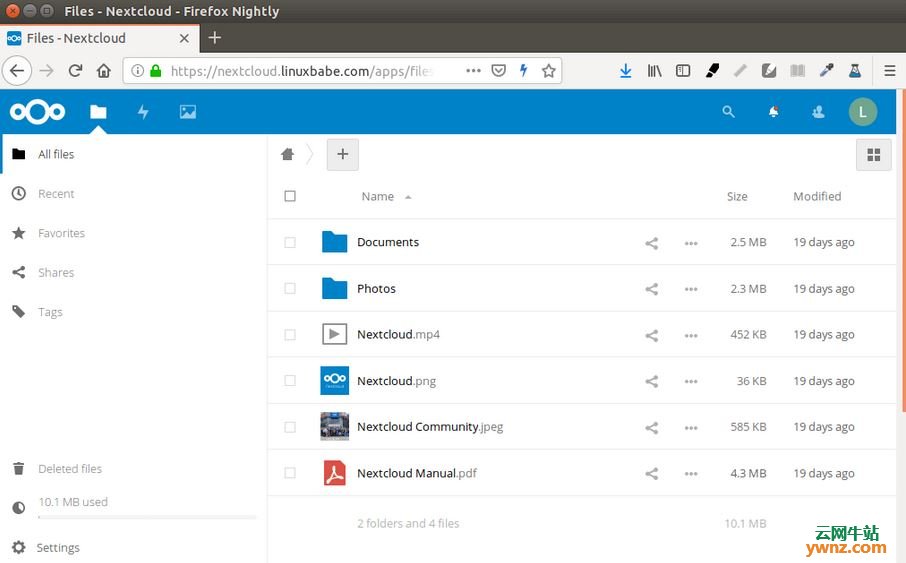
完成后,将看到Nextcloud管理中心的Web界面,如下图:
到这里,已经在RHEL 8/CentOS 8服务器上成功安装NextCloud,可以开始将其用作私有云存储服务了。
相关主题 |