|
本文介绍在RHEL/CentOS 8操作系统上安装和配置Nagios 4监控服务器的方法。
简介 Nagios是一个开源主机、服务、进程和网络监视工具,适用于各种操作系统,如Linux、Windows、BSD、AIX。 Nagios使用文本文件进行配置,并提供直观的Web界面以进行管理和监控。如果出现问题,服务质量下降或中断,Nagios将通过电子邮件,短信甚至电话发送警报(如果已配置)。
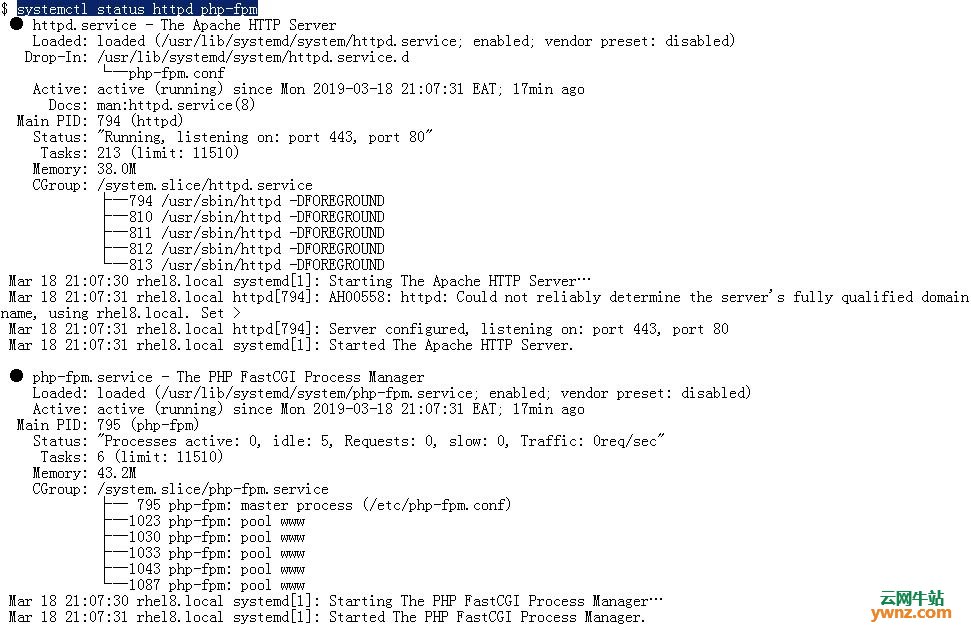
一、安装依赖项 建议使用更新系统,运行以下命令: sudo dnf update 安装在RHEL/CentOS 8上构建和运行Nagios Server所需的依赖项: sudo dnf install @perl @httpd wget unzip glibc automake glibc-common gettext autoconf php php-cli gcc gd gd-devel net-snmp openssl-devel unzip net-snmp postfix net-snmp-utils 如果要在RHEL/CentOS 8上安装开发工具,参考在RHEL 8/CentOS 8上安装GCC和Development Tools(开发工具): sudo dnf groupinstall "Development Tools" 安装完成后,启动并启用httpd和php-fpm服务: sudo systemctl enable --now httpd php-fpm 确认服务状态: $ systemctl status httpd php-fpm
参考:在RHEL 8系统中安装PHP 7.3及PHP 7.3-FPM的方法。
二、下载Nagios 到Nagios下载页面下载,然后将你的工作目录更改为/usr/src: sudo su - cd /usr/src 下载文件并解压缩Nagios tarball: curl -SL https://github.com/NagiosEnterprises/nagioscore/releases/download/nagios-4.4.3/nagios-4.4.3.tar.gz | tar -xzf - 更改为创建的Nagios文件夹: cd nagios-4.4.3
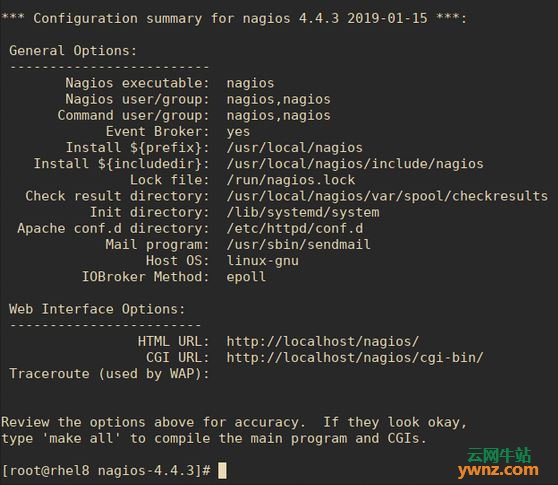
三、在RHEL/CentOS 8上编译Nagios 1.解压缩归档后,运行configure脚本: ./configure 样本输出如下:
2.使用all命令运行make命令以编译主程序和CGI: make all 3.在RHEL/CentOS 8上安装Nagios 安装Nagios base: make install 4.在/lib/systemd/system中安装init脚本: # make install-init /usr/bin/install -c -m 755 -d -o root -g root /lib/systemd/system /usr/bin/install -c -m 755 -o root -g root startup/default-service /lib/systemd/system/nagios.service 5.在目录上安装并配置用于保存外部命令文件的权限: # make install-commandmode /usr/bin/install -c -m 775 -o nagios -g nagios -d /usr/local/nagios/var/rw chmod g+s /usr/local/nagios/var/rw *** External command directory configured *** 6.在/usr/local/nagios/etc中安装示例配置文件: # make install-config /usr/bin/install -c -m 775 -o nagios -g nagios -d /usr/local/nagios/etc /usr/bin/install -c -m 775 -o nagios -g nagios -d /usr/local/nagios/etc/objects /usr/bin/install -c -b -m 664 -o nagios -g nagios sample-config/nagios.cfg /usr/local/nagios/etc/nagios.cfg /usr/bin/install -c -b -m 664 -o nagios -g nagios sample-config/cgi.cfg /usr/local/nagios/etc/cgi.cfg /usr/bin/install -c -b -m 660 -o nagios -g nagios sample-config/resource.cfg /usr/local/nagios/etc/resource.cfg /usr/bin/install -c -b -m 664 -o nagios -g nagios sample-config/template-object/templates.cfg /usr/local/nagios/etc/objects/templates.cfg /usr/bin/install -c -b -m 664 -o nagios -g nagios sample-config/template-object/commands.cfg /usr/local/nagios/etc/objects/commands.cfg /usr/bin/install -c -b -m 664 -o nagios -g nagios sample-config/template-object/contacts.cfg /usr/local/nagios/etc/objects/contacts.cfg /usr/bin/install -c -b -m 664 -o nagios -g nagios sample-config/template-object/timeperiods.cfg /usr/local/nagios/etc/objects/timeperiods.cfg /usr/bin/install -c -b -m 664 -o nagios -g nagios sample-config/template-object/localhost.cfg /usr/local/nagios/etc/objects/localhost.cfg /usr/bin/install -c -b -m 664 -o nagios -g nagios sample-config/template-object/windows.cfg /usr/local/nagios/etc/objects/windows.cfg /usr/bin/install -c -b -m 664 -o nagios -g nagios sample-config/template-object/printer.cfg /usr/local/nagios/etc/objects/printer.cfg /usr/bin/install -c -b -m 664 -o nagios -g nagios sample-config/template-object/switch.cfg /usr/local/nagios/etc/objects/switch.cfg *** Config files installed *** Remember, these are SAMPLE config files. You'll need to read the documentation for more information on how to actually define services, hosts, etc. to fit your particular needs. 7.为Nagios Web界面安装Apache配置文件: # make install-webconf /usr/bin/install -c -m 644 sample-config/httpd.conf /etc/httpd/conf.d/nagios.conf if [ 0 -eq 1 ]; then \ ln -s /etc/httpd/conf.d/nagios.conf /etc/apache2/sites-enabled/nagios.conf; \ fi *** Nagios/Apache conf file installed *** 8.为Nagios Web界面安装Exfoliation主题: # make install-exfoliation *** Exfoliation theme installed *** NOTE: Use 'make install-classicui' to revert to classic Nagios theme 9.安装Nagios Web界面的经典主题: # make install-classicui *** Classic theme installed *** NOTE: Use 'make install-exfoliation' to use new Nagios theme
四、创建Nagios Web用户 你需要添加用于访问Nagios Web界面的用户帐户,为此,我们将使用htpasswd写入/usr/local/nagios/etc/htpasswd.users文件: # htpasswd -c /usr/local/nagios/etc/htpasswd.users nagiosadmin New password: Re-type new password: Adding password for user nagiosadmin 输入并确认用户的密码,还需要重新启动Apache服务才能使更改生效: sudo systemctl restart httpd
五、安装Nagios插件 Nagios插件用于扩展Nagios监控功能,切换到/usr/src目录: cd /usr/src 从nagios-plugins下载页面下载Nagios插件: curl -SL https://github.com/nagios-plugins/nagios-plugins/releases/download/release-2.2.1/nagios-plugins-2.2.1.tar.gz | tar -xzf - 切换到插件源目录: cd nagios-plugins-2.2.1 通过运行以下命令编译并安装Nagios插件: ./configure --with-nagios-user=nagios --with-nagios-group=nagios make && make install 你应该在成功编译时看到以下输出信息: configure: creating ./config.status config.status: creating gl/Makefile config.status: creating nagios-plugins.spec config.status: creating tools/build_perl_modules config.status: creating Makefile config.status: creating tap/Makefile config.status: creating lib/Makefile config.status: creating plugins/Makefile config.status: creating lib/tests/Makefile config.status: creating plugins-root/Makefile config.status: creating plugins-scripts/Makefile config.status: creating plugins-scripts/utils.pm config.status: creating plugins-scripts/utils.sh config.status: creating perlmods/Makefile config.status: creating test.pl config.status: creating pkg/solaris/pkginfo config.status: creating po/Makefile.in config.status: creating config.h config.status: config.h is unchanged config.status: executing depfiles commands config.status: executing libtool commands config.status: executing po-directories commands config.status: creating po/POTFILES config.status: creating po/Makefile ....... make[1]: Leaving directory '/usr/src/nagios-plugins-2.2.1/po' make[1]: Entering directory '/usr/src/nagios-plugins-2.2.1' make[2]: Entering directory '/usr/src/nagios-plugins-2.2.1' make[2]: Nothing to be done for 'install-exec-am'. make[2]: Nothing to be done for 'install-data-am'. make[2]: Leaving directory '/usr/src/nagios-plugins-2.2.1' make[1]: Leaving directory '/usr/src/nagios-plugins-2.2.1'
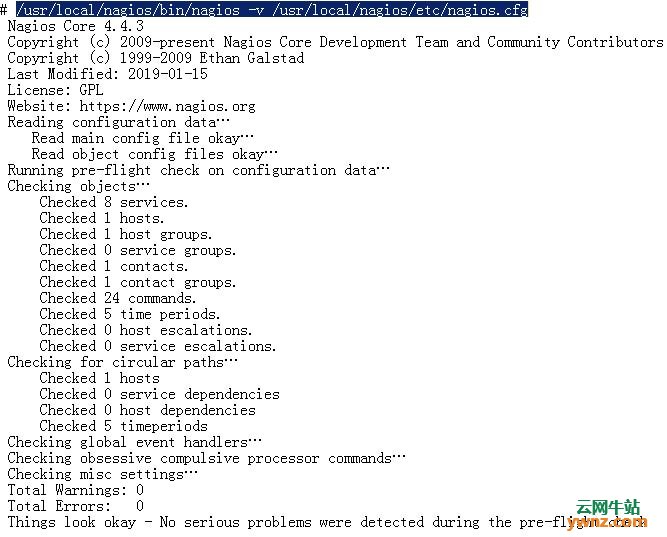
六、验证安装和启动Nagios服务 确认你的Nagios安装成功并正常工作: # /usr/local/nagios/bin/nagios -v /usr/local/nagios/etc/nagios.cfg
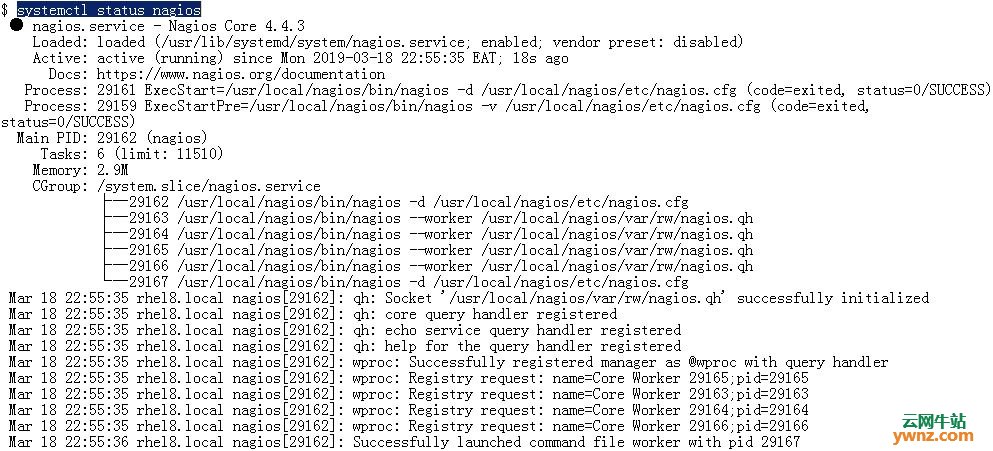
启动并启用nagios服务以在启动时启动: $ sudo systemctl enable --now nagios Created symlink /etc/systemd/system/multi-user.target.wants/nagios.service → /usr/lib/systemd/system/nagios.service. 服务状态应指示正在运行,运行systemctl status nagios命令查看:
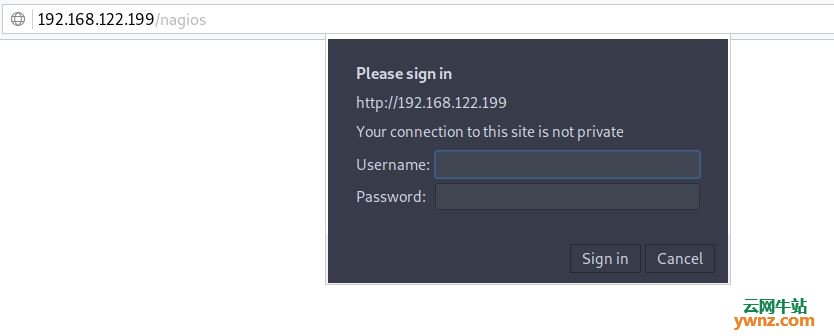
七、配置Nagios管理面板 允许防火墙上的http和https协议: sudo firewall-cmd --permanent --add-service={http,https} sudo firewall-cmd --reload 在安装过程中,添加了Nagios的Apache配置文件,你可以访问http:[IP/hostname]/nagios/上的管理面板,会先出来一个用户登陆页面:
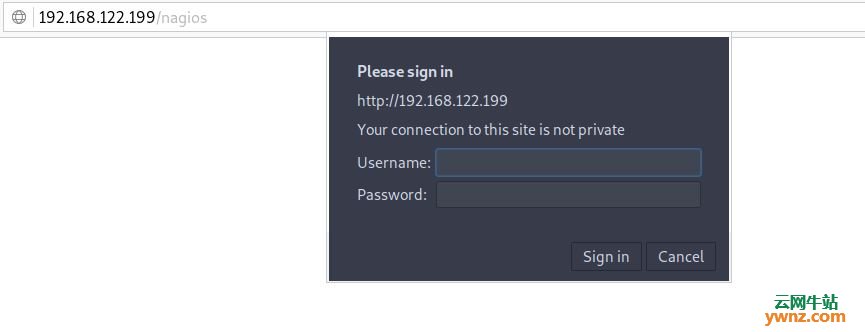
然后使用之前添加的用户名和密码在下图中进行身份验,正确即可登陆进去:
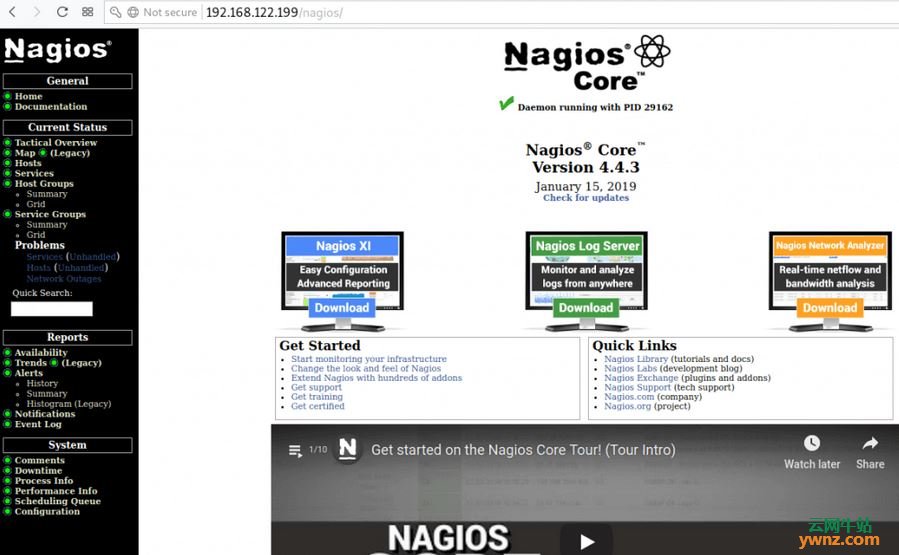
登陆后就能看到Nagios Dashboard,你可以在其中添加要监视的设备:
至此,安装和配置Nagios全部完成了。
相关主题 |