|
在本文中,我们将介绍如何将VM映像添加到Openstack Glance映像服务,我假设你已经有一个正在运行的Openstack设置,并且扫视服务在控制器节点上运行。
什么是Openstack image服务 Openstack浏览使用户能够发现,注册和检索虚拟机映像,这些images存储的默认位置是/var/lib/glance/images/,其后端是文件。 Openstack映像服务还提供REST API,使你可以查询虚拟机映像元数据并检索实际映像,你可以将通过Image服务提供的虚拟机映像存储在各种位置,从简单的文件系统到OpenStack Object Storage等对象存储系统。
获取Glance images 获取与OpenStack一起使用的虚拟机映像的最简单方法是下载其他人已创建的虚拟机映像,大多数映像都包含cloud-init软件包,以支持SSH密钥对和用户数据注入。 我将向你展示如何通过下载其他人已经制作的图像来为各种操作系统添加图像,当然,你可以创建自己的图像,但获取现成图像会更快。
默认登录凭据 以下是从短暂添加的图像创建的实例的默认登录用户名: Debian: debian Fedora: fedora Ubuntu: ubuntu RHEL: cloud-user CentOS: centos coreos: core Arch Linux: arch Gentoo: gentoo OpenSUSE: root Cirros: username: cirros Password: cubswin:)
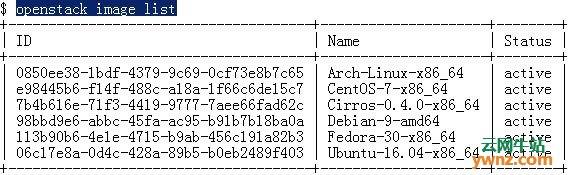
使用例子 1.将Cirros Cloud image添加到Glance中 $ wget http://download.cirros-cloud.net/0.4.0/cirros-0.4.0-x86_64-disk.img $ openstack image create \ --container-format bare \ --disk-format qcow2 \ --file cirros-0.4.0-x86_64-disk.img \ Cirros-0.4.0-x86_64 参考:在Linux系统中安装Wget、Htop、Nano、Lynx、Fzf、Pydf的方法。 2.将CentOS 7云映像添加到Openstack $ wget http://cloud.centos.org/centos/7/images/CentOS-7-x86_64-GenericCloud.qcow2 $ openstack image create \ --container-format bare \ --disk-format qcow2 \ --file CentOS-7-x86_64-GenericCloud.qcow2 \ CentOS-7-x86_64 3.将Ubuntu 18.04 Cloud Image添加到Openstack $ wget http://cloud-images.ubuntu.com/bionic/current/bionic-server-cloudimg-amd64.img $ openstack image create \ --container-format bare \ --disk-format qcow2 \ --file bionic-server-cloudimg-amd64.img \ Ubuntu-16.04-x86_64 4.将Debian 9 Cloud Image添加到Openstack $ wget http://cdimage.debian.org/cdimage/openstack/current-9/debian-9-openstack-amd64.qcow2 $ openstack image create \ --container-format bare \ --disk-format qcow2 \ --file debian-9-openstack-amd64.qcow2 \ Debian-9-amd64 5.将CoreOS Cloud Image添加到Openstack $ wget https://stable.release.core-os.net/amd64-usr/current/coreos_production_openstack_image.img.bz2 $ bunzip2 coreos_production_openstack_image.img.bz2 $ openstack image create \ --container-format bare \ --disk-format qcow2 \ --file coreos_production_openstack_image.img \ CoreOS-x86_64 6.将Arch Linux Cloud Image添加到Openstack $ wget https://linuximages.de/openstack/arch/arch-openstack-LATEST-image-bootstrap.qcow2 $ openstack image create \ --container-format bare \ --disk-format qcow2 \ --file arch-openstack-LATEST-image-bootstrap.qcow2 \ Arch-Linux-x86_64 7.将Gentoo Cloud Image添加到Openstack $ wget https://linuximages.de/openstack/gentoo/gentoo-openstack-LATEST-image-bootstrap.qcow2 $ openstack image create \ --container-format bare \ --disk-format qcow2 \ --file gentoo-openstack-LATEST-image-bootstrap.qcow2 \ Gentoo-Linux-x86_64 8.检查Glance中可用的图像列表 $ openstack image list
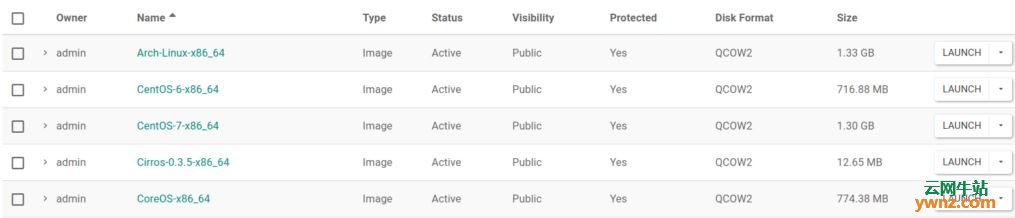
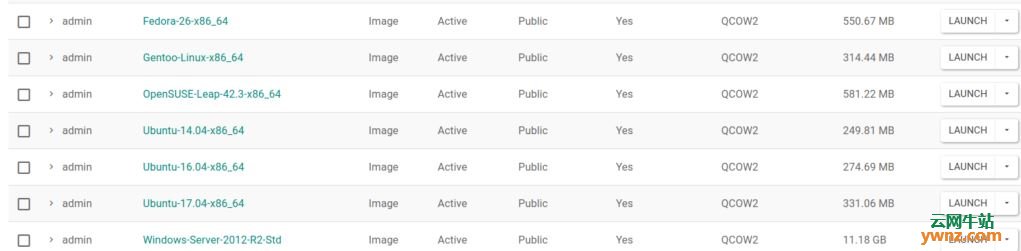
9.设置图像选项选项 现在让我们将所有图像设置为公开可见,并保护它们免遭意外删除: IMAGE_IDS=`openstack image list | egrep '[0-9a-f]{8}-[0-9a-f]{4}-[0-9a-f]{4}-[0-9a-f]{4}-[0-9a-f]{12}' -o` for i in ${IMAGE_IDS[@]}; do openstack image set --public $i openstack image set --protected $i done 通过转到项目>计算>图像(Project > Compute > Images)从Horizon仪表板确认,你应该注意到所有图像的Protected标志设置为yes,并且Visibility也设置为Public。
相关主题 |