|
本文介绍在Debian 10 Buster Server/Desktop操作系统上安装LEMP Stack的方法,构架是:Debian 10+Nginx+MariaDB和PHP7.3(LEMP堆栈)。在我们安装LEMP堆栈之前,最好更新存储库和软件包,在Debian 10 OS上运行sudo apt update和sudo apt upgrade命令。
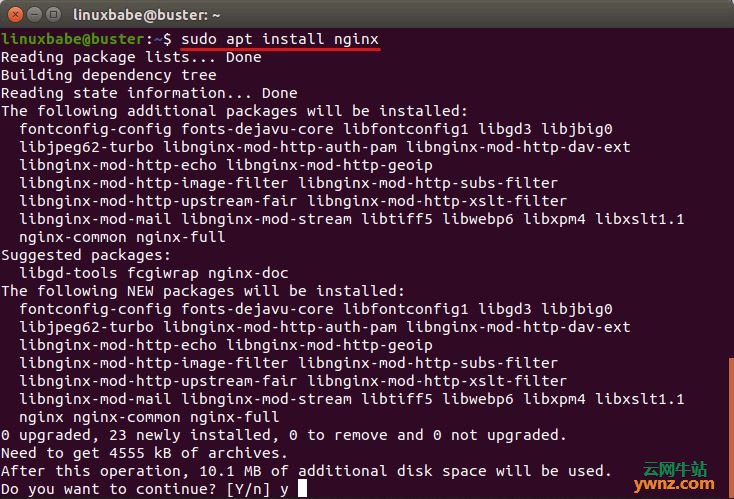
一、在Debian 10上安装Nginx Web服务器 Nginx是一款高性能的网络服务器,如今非常受欢迎,它还可以用作反向代理和缓存服务器,输入以下命令以安装Nginx Web服务器: sudo apt install nginx
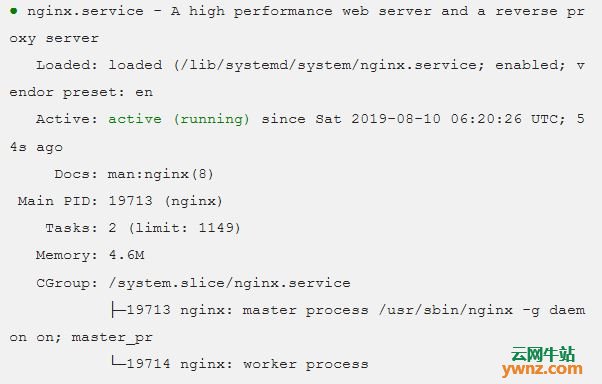
参考:在Debian 10 Linux上安装Nginx的方法。 安装完成后,应自动启动Nginx,使用systemctl检查其状态: systemctl status nginx 样本输出:
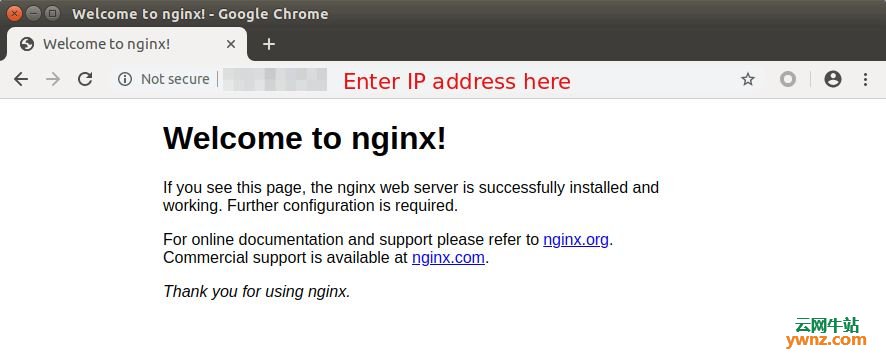
提示:如果上述命令没有立即退出,可以按Q键获取终端窗口的控制权。 如果它没有运行,请使用systemctl启动它: sudo systemctl start nginx 让Nginx在启动时自动启动也是个好主意: sudo systemctl enable nginx 检查Nginx版本: sudo nginx -v nginx version: nginx/1.14.2 现在,在浏览器地址栏中输入Debian 10服务器的公共IP地址,应该看到默认的“Welcome to nginx”网页,这意味着Nginx Web服务器正常运行,如果要在本地Debian 10计算机上安装LEMP,则应在浏览器地址栏中键入127.0.0.1或localhost:
如果连接被拒绝或无法完成,则可能存在防火墙阻止对TCP端口80的传入请求,如果使用iptables防火墙,则需要运行以下命令以打开TCP端口80: sudo iptables -I INPUT -p tcp --dport 80 -j ACCEPT 如果使用的是UFW防火墙,请运行此命令以打开TCP端口80: sudo ufw allow http 参考:Debian、Ubuntu、Linux Mint系统中的UFW防火墙入门教程。 现在我们需要将www-data(Nginx用户)设置为文档根目录(也称为Web根目录)的所有者,默认情况下,它由root用户拥有(请注意,Nginx默认使用/usr/share/nginx/html/作为Web根目录,而Apache Web服务器使用/var/www/html/作为root): sudo chown www-data:www-data /usr/share/nginx/html/ -R
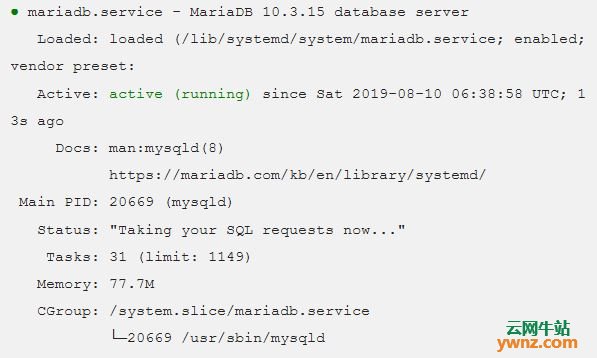
二、在Debian 10上安装MariaDB数据库服务器 MariaDB是MySQL的直接替代品,输入以下命令将其安装在Debian 10上: sudo apt install mariadb-server mariadb-client 安装完成后,应自动启动MariaDB服务器,使用systemctl检查其状态: systemctl status mariadb 输出:
如果它没有运行,请使用以下命令启动它: sudo systemctl start mariadb 要使MariaDB在引导时自动启动,请运行: sudo systemctl enable mariadb 参考:在Debian 10(Buster)上安装MariaDB 10.4的方法。
三、在Debian 10上安装PHP7.3 在选写本文时,PHP7.3是PHP的最新稳定版本,与以前的版本相比,性能略有提升,输入以下命令以从Debian 10存储库安装PHP7.3和一些常见的PHP扩展: sudo apt install php7.3 php7.3-fpm php7.3-mysql php-common php7.3-cli php7.3-common php7.3-json php7.3-opcache php7.3-readline 检查PHP版本信息: php --version PHP 7.3.4-2 (cli) (built: Apr 13 2019 19:05:48) ( NTS ) Copyright (c) 1997-2018 The PHP Group Zend Engine v3.3.4, Copyright (c) 1998-2018 Zend Technologies with Zend OPcache v7.3.4-2, Copyright (c) 1999-2018, by Zend Technologies 现在开始php7.3-fpm: sudo systemctl start php7.3-fpm 启动时启用自动启动: sudo systemctl enable php7.3-fpm 检查状态: systemctl status php7.3-fpm
四、创建Nginx服务器块 Nginx服务器块就像Apache中的虚拟主机,我们不会使用默认服务器块,因为它不足以运行PHP代码,请运行以下命令,删除启用了站点的目录中的默认符号链接(它仍可用作/etc/nginx/sites-available/default): sudo rm /etc/nginx/sites-enabled/default 然后使用命令行文本编辑器(如Nano)在/etc/nginx/conf.d/目录下创建一个全新的服务器块文件: sudo nano /etc/nginx/conf.d/default.conf 将以下文本粘贴到文件中,以下代码片段将使Nginx在IPv4端口80和IPv6端口80上侦听一个包含所有服务器的名称: server { listen 80; listen [::]:80; server_name _; root /usr/share/nginx/html/; index index.php index.html index.htm index.nginx-debian.html; location / { try_files $uri $uri/ /index.php; } location ~ \.php$ { fastcgi_pass unix:/run/php/php7.3-fpm.sock; fastcgi_param SCRIPT_FILENAME $document_root$fastcgi_script_name; include fastcgi_params; include snippets/fastcgi-php.conf; } # A long browser cache lifetime can speed up repeat visits to your page location ~* \.(jpg|jpeg|gif|png|webp|svg|woff|woff2|ttf|css|js|ico|xml)$ { access_log off; log_not_found off; expires 360d; } # disable access to hidden files location ~ /\.ht { access_log off; log_not_found off; deny all; } } 保存并关闭文件,然后测试Nginx配置: sudo nginx -t 如果测试成功,请重新加载Nginx: sudo systemctl reload nginx
五、测试PHP 要使用Nginx服务器测试PHP脚本,我们需要在Web根目录中创建一个info.php文件: sudo nano /usr/share/nginx/html/info.php 将以下PHP代码粘贴到文件中: <?php phpinfo(); ?> 保存并关闭文件。 现在在浏览器地址栏中输入server-ip-address/info.php,将sever-ip-address替换为你的实际IP,如果你在本地计算机上按照本教程操作,请键入127.0.0.1/info.php或localhost/info.php。 你应该看到服务器的PHP信息,这意味着PHP脚本可以使用Nginx Web服务器正常运行,你可以找到Zend OPcache已启用:
至此,你已在Debian 10 Buster上成功安装了Nginx、MariaDB和PHP7.3,为了你服务器的安全,应该立即删除info.php文件,以防止窥探: sudo rm /usr/share/nginx/html/info.php 至此,在Debian 10 Buster上安装LEMP堆栈的操作全部完成。
相关主题 |