|
本文介绍在CentOS 7系统中安装和配置SonarQube代码检查工具的方法,按照本文的顺序操作即可:完成系统设置、在CentOS 7上安装Java 11、安装和配置PostgreSQL、提取并安装SonarQube、配置SonarQube、更改防火墙规则以允许SonarQube访问、访问Web用户界面、登入。
步骤1:完成系统设置 在此步骤中,请确保服务器已正确更新。现在我们将调整系统设置,例如SELinux、max_map_count和fs.file-max。请运行以下命令以更新服务器: sudo yum update sudo yum install vim wget curl -y 1、将SELinux配置为允许 这可以通过运行以下命令来完成: sudo setenforce 0 sudo sed -i 's/^SELINUX=enforcing$/SELINUX=permissive/' /etc/selinux/config 参考:在CentOS 8上检查SELinux模式、将模式更改为Permissive及禁用的方法。 2、调整max_map_count和fs.file-max 从Linux内核文档中,地址https://www.kernel.org/doc/Documentation/sysctl/vm.txt,此文件包含一个进程可能具有的最大内存映射区域数。 要调整设置以符合SonarQube的要求,请打开“/etc/sysctl.conf”文件并添加设置,如下所示: $ sudo vim /etc/sysctl.conf vm.max_map_count=262144 fs.file-max=65536 3、创建一个sonar用户 建议创建一个单独的用户来运行SonarQube。让我们创建一个: sudo useradd sonar 然后为用户设置密码: sudo passwd sonar
步骤2:在CentOS 7上安装Java 11 SonarQube用Java编写,并且需要安装Java。可在CentOS 7中安装Java 11,参考在CentOS 7/Fedora 29系统上安装Java 11的方法。
步骤3:安装和配置PostgreSQL 我们将在SonarQube的同一服务器上安装PostgreSQL 11。您也可以根据需要将其托管在其他服务器上。要在CentOS 7服务器上安装PostgreSQL 11,请按照以下步骤安装并快速运行。 1、添加PostgreSQL Yum存储库 通过运行下面的命令,将PostgreSQL Yum Repository添加到您的CentOS 7系统: sudo yum install -y https://download.postgresql.org/pub/repos/yum/reporpms/EL-7-x86_64/pgdg-redhat-repo-latest.noarch.rpm 2、安装PostgreSQL服务器和客户端软件包 添加PostgreSQL Yum存储库后,安装PostgreSQL服务器/客户端软件包: sudo yum -y install postgresql11-server postgresql11 3、安装后,初始化数据库并启用自动启动 现在已经安装了数据库软件包,通过运行以下命令来初始化数据库: sudo /usr/pgsql-11/bin/postgresql-11-setup initdb 然后启动并启用服务以在启动时启动: sudo systemctl start postgresql-11 sudo systemctl enable postgresql-11 安装PostgreSQL服务器后,请按照以下步骤进行配置。打开pg_hba.conf文件,将“peer”更改为“trust”,将“idnet”更改为“md5”,如下: $ sudo vim /var/lib/pgsql/11/data/pg_hba.conf ##Change this local all all peer # IPv4 local connections: host all all 127.0.0.1/32 ident # IPv6 local connections: host all all ::1/128 ident # Allow replication connections from localhost, by a user with the # replication privilege. local replication all peer host replication all 127.0.0.1/32 ident host replication all ::1/128 ident ##To this: local all all trust # IPv4 local connections: host all all 127.0.0.1/32 md5 # IPv6 local connections: host all all ::1/128 md5 # Allow replication connections from localhost, by a user with the # replication privilege. local replication all peer host replication all 127.0.0.1/32 md5 host replication all ::1/128 md5 4、启用对PostgreSQL的远程访问 如果您的应用程序位于远程位置,那么您将需要允许它如下访问数据库。 编辑文件/var/lib/pgsql/11/data/postgresql.conf并将所有服务器的监听地址设置为服务器IP地址或“*”: $ sudo vim /var/lib/pgsql/11/data/postgresql.conf listen_addresses = '10.38.87.160' 然后将以下内容添加到“pg_hba.conf”文件中: $ sudo vim /var/lib/pgsql/11/data/pg_hba.conf # Accept from anywhere host all all 0.0.0.0/0 md5 # Or accept from trusted subnet host all all 10.38.87.0/24 md5 重新启动PostgreSQL服务: sudo systemctl restart postgresql-11 5、设置PostgreSQL管理员用户 我们将需要更改admin postgres用户的密码,如下所示: $ sudo su - postgres -bash-4.2$ -bash-4.2$: psql postgres=# alter user postgres with password 'StrongPassword'; ALTER ROLE postgres=# 6、创建SonarQube用户和数据库 接下来,我们将为SonarQube创建一个用户。退出数据库之前,请按照如下所示进行操作: postgres=# createuser sonar; postgres=# createdb sonar_db owner sonar; postgres=# grant all privileges on database sonar_db to sonar; 为sonar用户设置密码: postgres=# ALTER USER sonar WITH ENCRYPTED password 'StrongPassword';
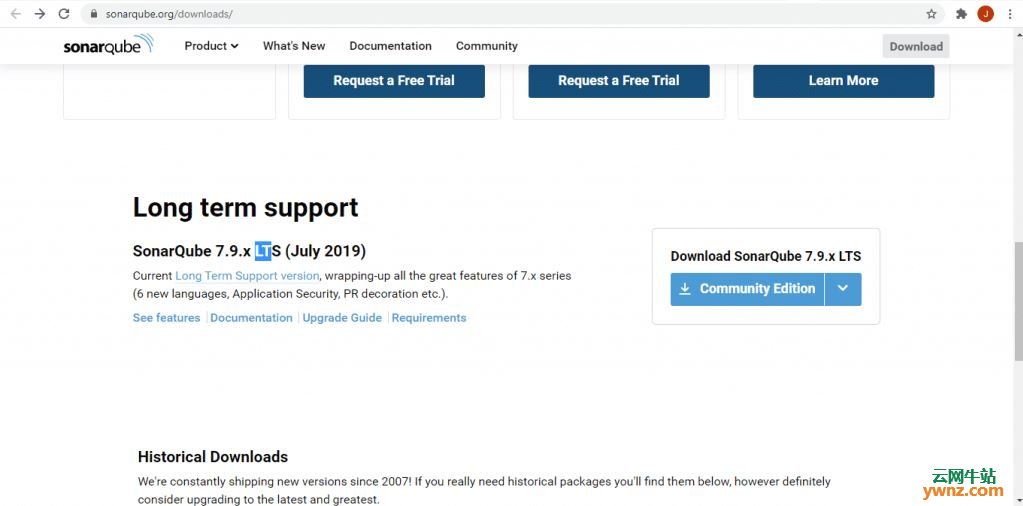
步骤4:提取并安装SonarQube 现在我们将下载SonarQube的长期版本,然后安装在我们的服务器中。请按照以下步骤进行操作,以安装我们的SonarQube。 1、获取SonarQube LTS版本 您可以访问SonarQube下载页面以查看其各种产品,地址在https://www.sonarqube.org/downloads/。我们将下载长期版本(LTS):
也可在终端中下载SonarQube: cd /opt/ sudo wget https://binaries.sonarsource.com/Distribution/sonarqube/sonarqube-7.9.5.zip 然后解压缩文件: sudo unzip sonarqube-7.9.5.zip 之后,将文件夹重命名为sonarqube: sudo mv sonarqube-7.9.5 sonarqube
步骤5:配置SonarQube 将文件提取到/opt/目录后,就可以配置应用程序了。 打开“/opt/sonarqube/conf/sonar.properties”文件,并添加数据库详细信息,如下所示。除此之外,找到共享的行并取消注释: $ sudo vim /opt/sonarqube/conf/sonar.properties \##Database details sonar.jdbc.username=sonar sonar.jdbc.password=StrongPassword sonar.jdbc.url=jdbc:postgresql://localhost/sonar_db \##How you will access SonarQube Web UI sonar.web.host=10.38.87.160 sonar.web.port=9000 \##Java options sonar.web.javaOpts=-server -Xms512m -Xmx512m -XX:+HeapDumpOnOutOfMemoryError sonar.search.javaOpts=-server -Xms512m -Xmx512m -XX:+HeapDumpOnOutOfMemoryError \##Also add the following Elasticsearch storage paths sonar.path.data=/var/sonarqube/data sonar.path.temp=/var/sonarqube/temp 将SonarQube文件的所有权授予我们在步骤1中创建的sonar用户: sudo chown -R sonar:sonar /opt/sonarqube 如果无法在默认位置找到Java,则必须指定SonarQube的二进制文件才能找到。您可以在“/opt/sonarqube/conf/wrapper.conf”文件中指定java的位置。查找“wrapper.java.command”行,并将您的Java位置放置在其旁边: $ sudo vim /opt/sonarqube/conf/wrapper.conf wrapper.java.command=/usr/local/jdk-11.0.2/bin/java 下面将进行添加SonarQube SystemD服务文件的操作。 现在我们将确保我们能够通过Systemd管理SonarQube应用程序,以便像在服务器中的其他服务一样启动和停止它: $ sudo vim /etc/systemd/system/sonarqube.service [Unit] Description=SonarQube service After=syslog.target network.target [Service] Type=forking ExecStart=/opt/sonarqube/bin/linux-x86-64/sonar.sh start ExecStop=/opt/sonarqube/bin/linux-x86-64/sonar.sh stop LimitNOFILE=65536 LimitNPROC=4096 User=sonar Group=sonar Restart=on-failure [Install] WantedBy=multi-user.target 编辑systemd文件后,我们必须重新加载它们,以便可以读取和加载它们: sudo systemctl daemon-reload 然后启动并启用服务: sudo systemctl start sonarqube.service sudo systemctl enable sonarqube.service 检查其状态是否成功启动并正在运行: sudo systemctl status sonarqube.service
步骤6:更改防火墙规则以允许SonarQube访问 此时,应运行sonarqube服务。如果您无法访问Web界面,请访问“/opt/sonarqube/logs”中的日志文件,在该文件中您将找到: elasticsearch logs (es.log) Sonar logs (sonar.log) web logs (web.log) Access logs (access.log) And others 我们使SonarQube Web能够侦听9000端口,并且应该在防火墙上对此进行允许。继续执行以下共享的操作: sudo firewall-cmd --permanent --add-port=9000/tcp && sudo firewall-cmd --reload
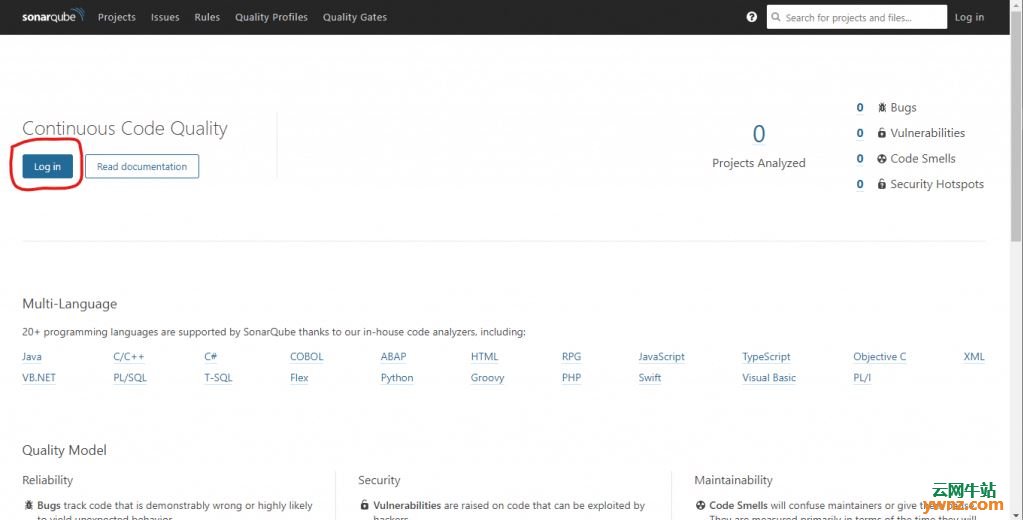
步骤7:访问Web用户界面 现在,我们准备访问SonarQube界面,并开始评估我们的代码的安全性。要访问该界面,请打开您喜欢的浏览器并将其指向http://server-ip-or-fqdn:9000。您应该看到与以下页面相似的页面:
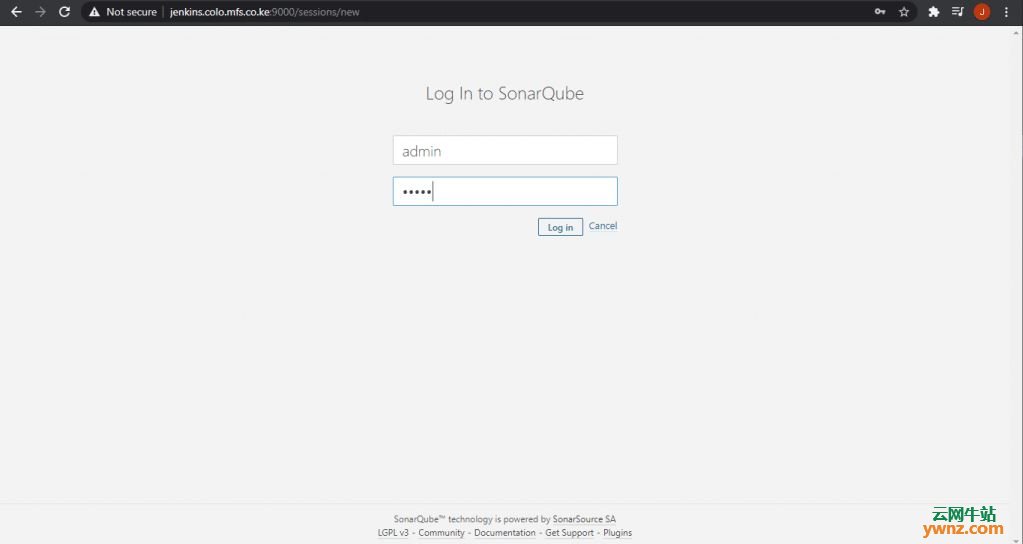
步骤8:登入 要登录,只需单击上面共享的“登录(Log In)”按钮,您将进入到如下页面。使用用户名为“admin”,密码为“admin”:
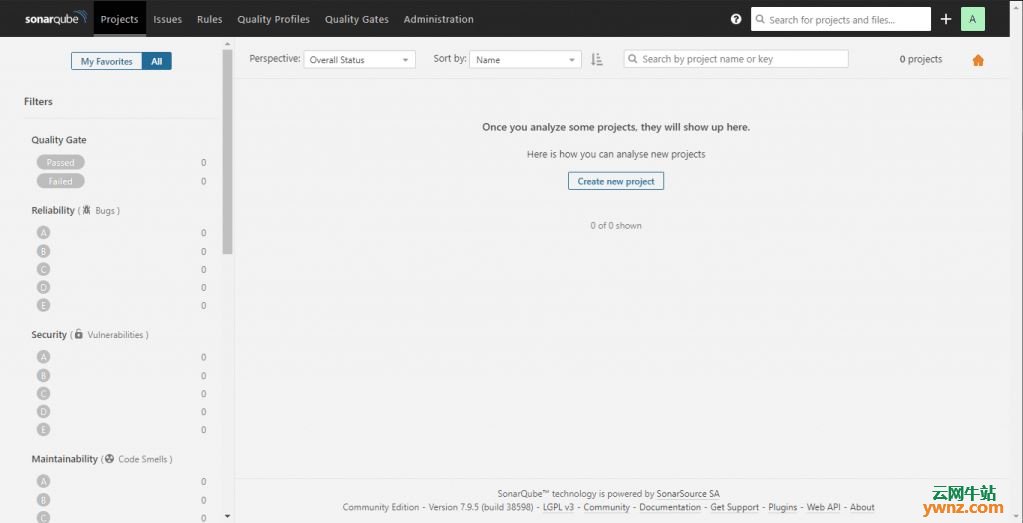
并且您应该被引导到如下所示的主要区域:
至此,在CentOS 7中安装和配置SonarQube全部完成。
相关主题 |