|
本文介绍在CentOS 7操作系统上为Apache/Nginx安装和配置Varnish Cache 6的方法,它是一种Web应用程序加速器,通常称为缓存HTTP反向代理,Vanish通常安装在Web服务器(如Apache或Nginx)的前面,并配置为缓存这些服务器的内容。
一、添加EPEL存储库、安装Dependency包、添加Varnish Cache存储库 1、添加EPEL存储库 先运行以下命令将EPEL添加到CentOS 7系统: sudo yum install -y epel-release “-y”表示在下载和安装软件包之前没有给出提示。 2、安装Dependency包 如果通过repo管理工具添加存储库,我们需要安装pygpgme和yum-utils: sudo yum -y install pygpgme yum-utils 3、添加Varnish Cache存储库 在此步骤中,我们将为CentOS 7添加Varnish Cache存储库,复制下面的命令并将其粘贴到终端上,使用具有sudo访问权限的用户帐户(知识扩展:在Linux系统下查找所有sudo用户的方法): sudo tee /etc/yum.repos.d/varnish60lts.repo<<EOF [varnish60lts] name=varnishcache_varnish60lts baseurl=https://packagecloud.io/varnishcache/varnish60lts/el/7/x86_64 repo_gpgcheck=1 gpgcheck=0 enabled=1 gpgkey=https://packagecloud.io/varnishcache/varnish60lts/gpgkey sslverify=1 sslcacert=/etc/pki/tls/certs/ca-bundle.crt metadata_expire=300 EOF
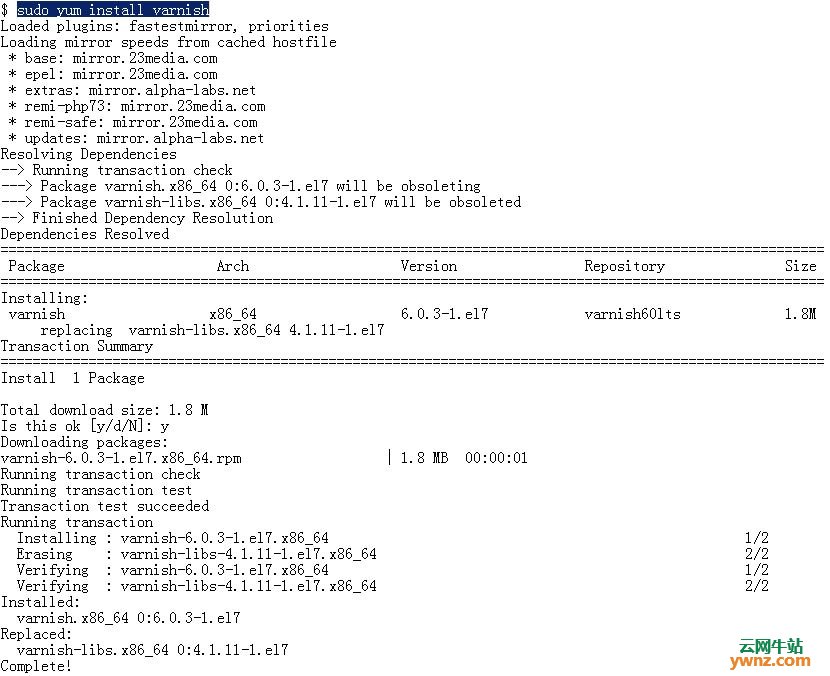
二、在CentOS 7上安装Varnish 6 在CentOS 7系统上,更新Yum缓存是可选的,让我们在安装应用程序之前更新我们的本地yum缓存,这里我们仅限于更新添加的存储库: $ sudo yum -q makecache -y --disablerepo='*' --enablerepo='varnish60lts' Importing GPG key 0xA750EDCD: Userid: "https://packagecloud.io/varnishcache/varnish60lts (https://packagecloud.io/docs#gpg_signing) support@packagecloud.io" Fingerprint: 48d8 1a24 cb04 56f5 d594 31d9 4cfc fd6b a750 edcd From: https://packagecloud.io/varnishcache/varnish60lts/gpgkey 然后在CentOS 7上安装Varnish 6: $ sudo yum install varnish
有关已安装软件包的更多信息,请使用: $ rpm -qi varnish 关于CentOS 7上Varnish安装的主要说明: 主要的Varnish配置文件是/etc/varnish/default.vcl。 Varnish secret文件:/etc/varnish/secret。 Varnish Cache可执行二进制文件:/usr/sbin/varnishd。 Varnish Systemd单元文件:/lib/systemd/system/varnish.service 和 /etc/systemd/system/multi-user.target.wants/varnish.service。
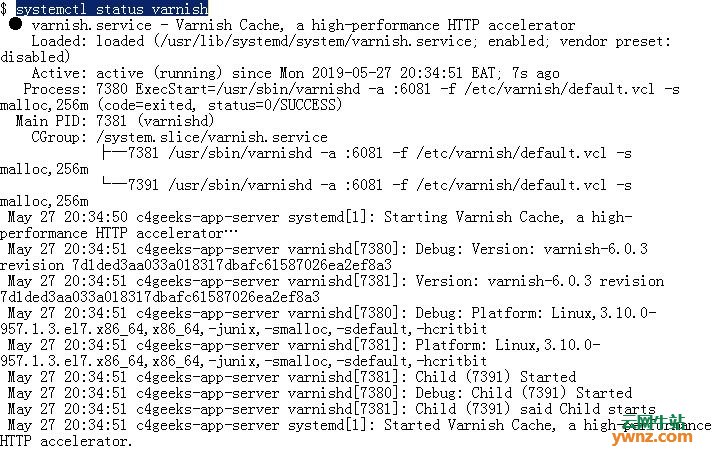
三、在CentOS 7上启动并启用Varnish 启动并启用Varnish进程以在系统引导时启动: sudo systemctl enable --now varnish 使用以下命令验证Varnish是否正在运行: $ systemctl status varnish
从输出中,我们可以看到状态为“running”,这意味着我们的Varnish安装已准备就绪。
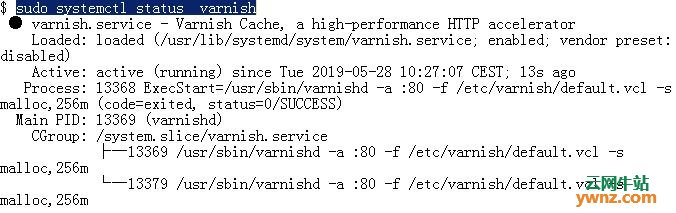
四、为Nginx/Apache Web服务器配置Varnish Cache缓存 我们之前说过,Varnish Cache是一个缓存HTTP反向代理,它位于Web服务器的前面,目标是加速Web服务器。 安装你需要的Web服务器: 安装Apache(参考如何在CentOS 7系统下安装Apache一文): $ sudo yum -y install httpd 安装Nginx: $ sudo yum -y install nginx 1.配置Nginx以使用Varnish Cache 默认情况下,Nginx侦听TCP 80端口,需要将侦听端口更改为8080,Varnish Cache将使用80端口: $ sudo vi /etc/nginx/nginx.conf ..... server { listen 8080 default_server; .... } 如果使用虚拟主机功能,请编辑相关配置文件,例如: $ sudo vi /etc/nginx/conf.d/mysite.conf 然后重启Nginx: $ sudo systemctl restart nginx 确认的设置,运行以下命令: $ ss -tunelp | grep 8080 tcp LISTEN 0 128 *:8080 *:* users:(("nginx",pid=13073,fd=6),("nginx",pid=13072,fd=6),("nginx",pid=13071,fd=6)) ino:34626 sk:ffff8af4b7a9ec80 <-> tcp LISTEN 0 128 :::8080 :::* users:(("nginx",pid=13073,fd=7),("nginx",pid=13072,fd=7),("nginx",pid=13071,fd=7)) ino:34627 sk:ffff8af52e828840 v6only:1 <-> 2.配置Apache以使用Varnish Cache 如果使用的是Apache Web服务器,请将Listen端口设置为8080: $ sudo vi /etc/httpd/conf/httpd.conf ... Listen 8080 也可以使用单个sed命令: sudo sed -i "s/Listen 80/Listen 8080/" /etc/httpd/conf/httpd.conf 更改后重新启动httpd服务: sudo systemctl restart httpd 3.配置Varnish Cache缓存服务器 现在编辑Varnish Cache配置文件并将Listen端口设置为80: sudo vi /etc/systemd/system/multi-user.target.wants/varnish.service 编辑以ExecStart开头的行,并从以下位置更改: ExecStart=/usr/sbin/varnishd -a :6081 -f /etc/varnish/default.vcl -s malloc,256m 改成: ExecStart=/usr/sbin/varnishd -a :80 -f /etc/varnish/default.vcl -s malloc,256m 然后重新启动varnish systemd服务: sudo systemctl daemon-reload sudo systemctl restart varnish 确认使用Varnish端口: $ sudo systemctl status varnish
确保将Nginx/Apache配置为Varnish代理的后端服务器: $ sudo vi /etc/varnish/default.vcl ..... # Default backend definition. Set this to point to your content server. backend default { .host = "127.0.0.1"; .port = "8080"; } ....... 注意8080端口在Apache/Nginx Web服务器上配置。 对于多个后端,你的配置将如下所示: backend default { .host = "127.0.0.1"; .port = "8080"; } backend java { .host = "127.0.0.1"; .port = "8000"; } 但是你需要告诉Varnish使用vcl_recv在哪里发送差异URL,我们的Java应用程序应该处理以/java/开头的URL: sub vcl_recv { if (req.url ~ "^/java/") { set req.backend_hint = java; } else { set req.backend_hint = default; } }
五、在Nginx/Apache上测试Varnish Cache 最后,我们测试是否启用了Varnish缓存,使用下面的curl命令: $ curl -I http://localhost HTTP/1.1 200 OK Server: nginx/1.12.2 Date: Tue, 28 May 2019 08:51:32 GMT Content-Type: text/html Content-Length: 3700 Last-Modified: Fri, 10 May 2019 08:08:40 GMT ETag: "5cd53188-e74" X-Varnish: 65544 Age: 0 Via: 1.1 varnish (Varnish/6.0) Accept-Ranges: bytes Connection: keep-alive 这为你提供了HTTP标头信息。 如果重新运行该命令,它将显示Varnish缓存的响应(注意Age标头): $ curl -I http://localhost HTTP/1.1 200 OK Server: nginx/1.12.2 Date: Tue, 28 May 2019 08:51:32 GMT Content-Type: text/html Content-Length: 3700 Last-Modified: Fri, 10 May 2019 08:08:40 GMT ETag: "5cd53188-e74" X-Varnish: 65547 65545 Age: 44 Via: 1.1 varnish (Varnish/6.0) Accept-Ranges: bytes Connection: keep-alive 对于具有DNS A记录集的有效域名,它应该相同,如: $ curl -I https://blog.computingforgeeks.com HTTP/2 200 date: Tue, 28 May 2019 09:09:20 GMT content-type: text/html set-cookie: __cfduid=de1acba723fc04cdfb58c84af80ac1b401559034559; expires=Wed, 27-May-20 09:09:19 GMT; path=/; domain=.computingforgeeks.com; HttpOnly; Secure last-modified: Fri, 10 May 2019 08:08:40 GMT x-varnish: 65557 17 age: 22 via: 1.1 varnish (Varnish/6.0) accept-ranges: bytes expect-ct: max-age=604800, report-uri="https://report-uri.cloudflare.com/cdn-cgi/beacon/expect-ct" server: cloudflare cf-ray: 4ddf16ce9d86cb77-MBA 至此,我们已经在CentOS 7上为Nginx和Apache Web服务器安装并配置了Varnish Cache。
相关主题 |